


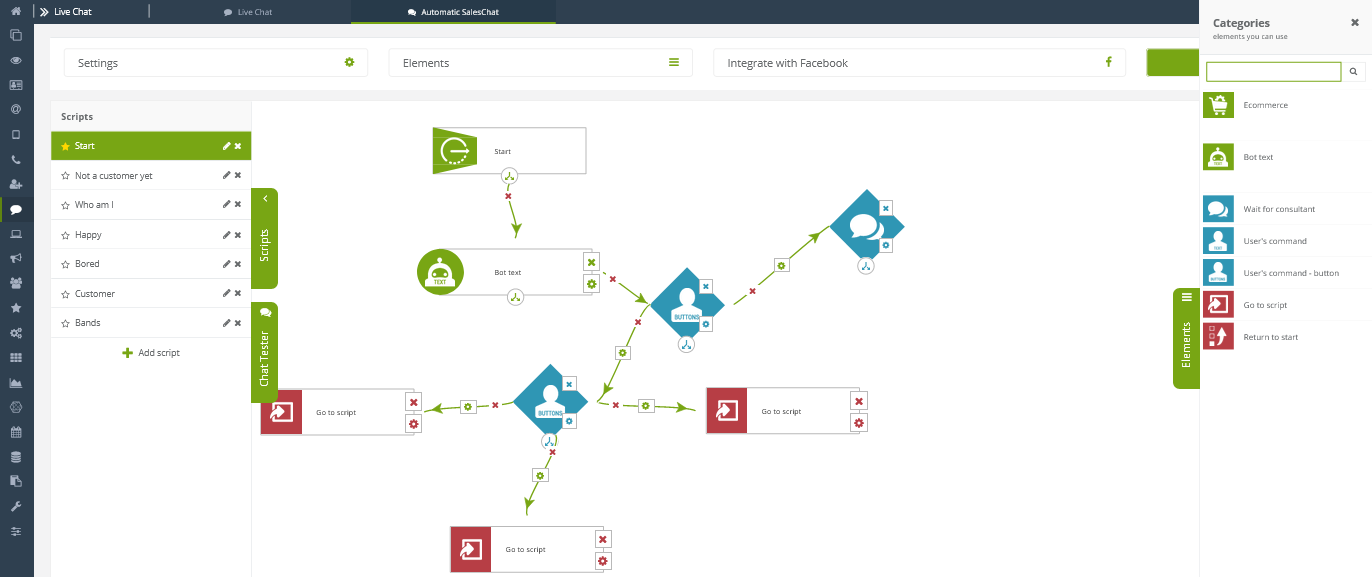
Automatic Sales Chat is a chatbot that uses scenario sets to replace consultants in conversations with customers and thus improve the work of the customer service department. It is an ideal solution for eCommerce, allowing customers to quickly get information about the product they are interested in. If the bot is unable to answer the question, a consultant can join the conversation at any time. Additionally, in the chat it is possible to display the product with a redirection to a selected URL, for example a product page in a store.
In SALESmanago you can create your own chatbot. Automatic Sales Chat works on the Messenger platform. Set the bot’s scenarios, save it, and then integrate with your Facebook page. One bot can have any number of scenarios, but only one bot can be integrated into one Facebook page.
How to create an Automatic Sales Chatbot >>
To integrate chat with the Facebook page, go to
Live Chat → Automatic SalesChat → Select bot → Integrate with Facebook
Contents
- Integration settings from SALESmanago level
- Integration settings from Facebook level – creating application
1. Integration settings from SALESmanago level
To open the integration settings go to the Automatic SalesChat tab, select any bot from your list, and at the top of the page click the Integrate with Facebook button. You will see the following window:
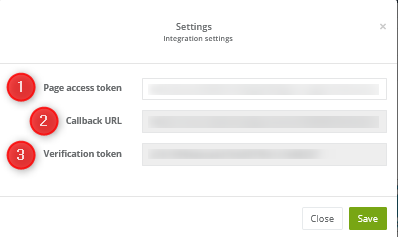
[1] Page access token – in this field enter the code generated in your Facebook for Developers website account.
[2] Callback URL – after creating the bot, the code will be displayed here. This is the “address” of this bot. Copy and paste it into the Callback URL field (in Facebook Developers → Webhooks → Messenger configuration).
[3] Verification token – after creating the bot, the verification token will be displayed here. Copy and paste it in the Webhooks settings.
After setting the bot, its application on the Facebook Developers account and pasting codes, click Save.
2. Integration settings from Facebook level – creating applications
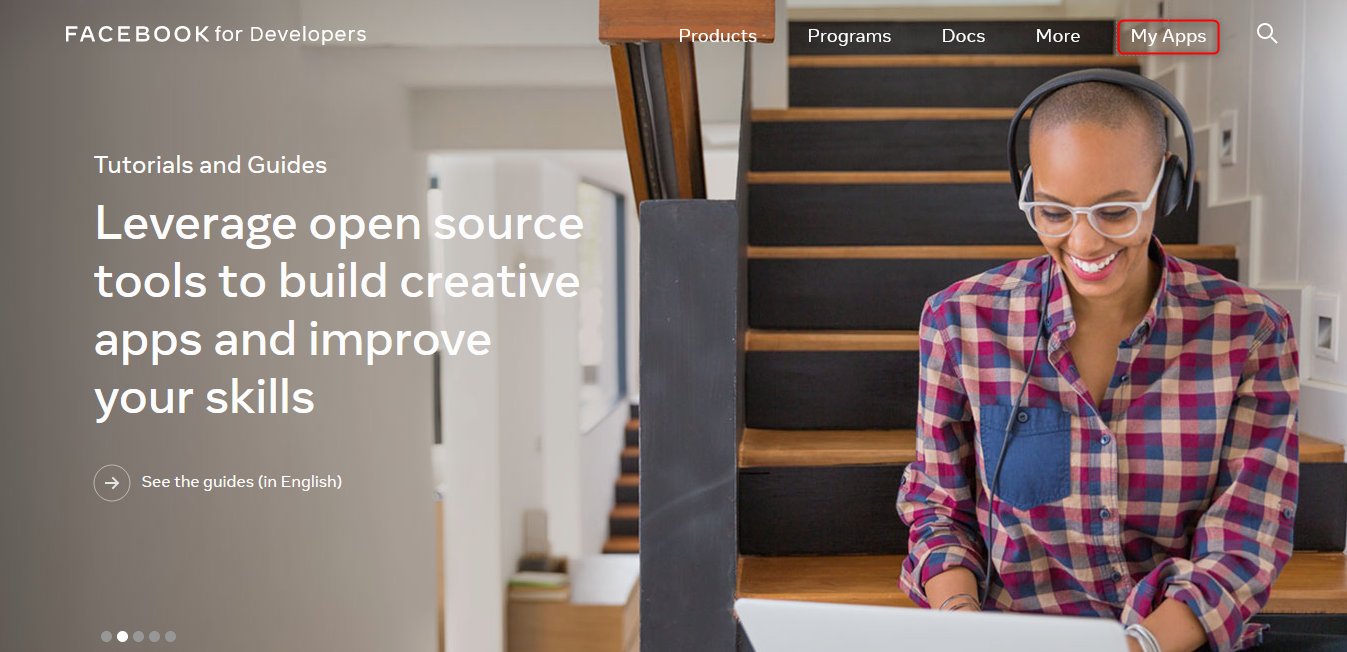
To properly integrate Automatic SalesChat with Facebook, you must log in to your Facebook for Developers account.

After logging in, the first step is to create a new application. Select the My Apps tab:
You will be automatically taken to a new page. In this panel, click the Create App button:
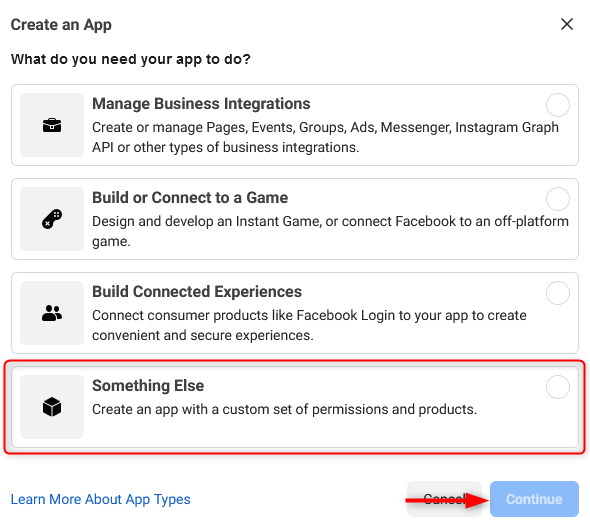
Select “Something Else” and click Continue. In the next window, enter the data to create the application:
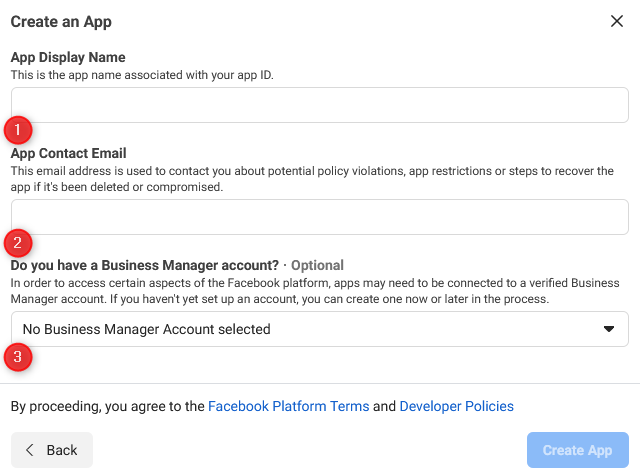
[1] App Display Name — enter the name of the application here. The name of the bot itself will be the same as the name of the site you link it to.
[2] App Contact Email — enter the email address to which you want messages regarding this application to be delivered.
[3] Business Manager – some aspects of Facebook require you to have a Business Manager account linked to Facebook for Developers, but in our case this is not necessary.
Click Create App if you have entered all the necessary data. After the security check, you will be taken to the management panel of your application.
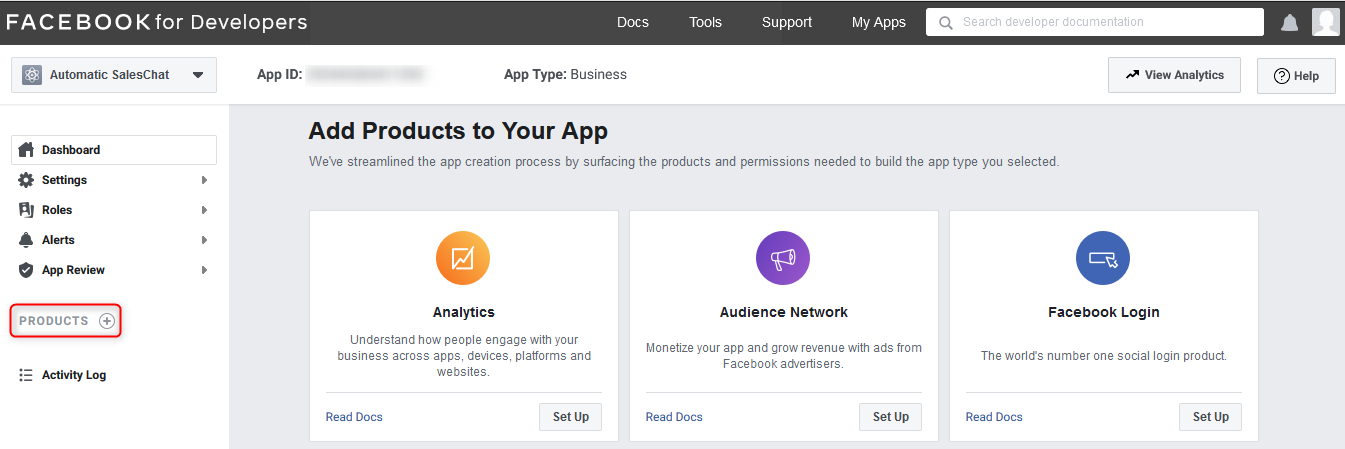
The next step after creating the application is adding the product. To do this, click on the element marked in the picture below:
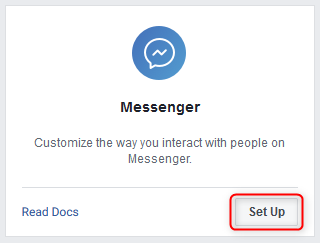
Select Messenger from the list of available options and click the Set Up button:
Let’s start with setting up webhooks. As in the picture below, click the Add Callback URL button:

You will get a pop-up with the following settings:
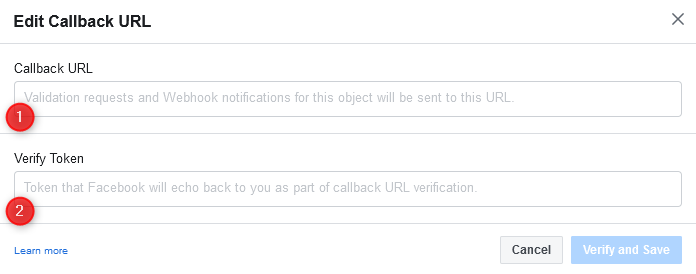
[1] Callback URL – paste the previously generated [2] Callback URL from the first point, Integration settings from SALESmanago level. Each bot has its own URL.
[2] Verify token – paste the previously generated [3] Verification token from the first point, Integration settings from SALESmanago level.
After filling in all the fields, click Verify and Save. The next step is to generate an access token. To do this, click the Add or remove pages button in the Access tokens tile.
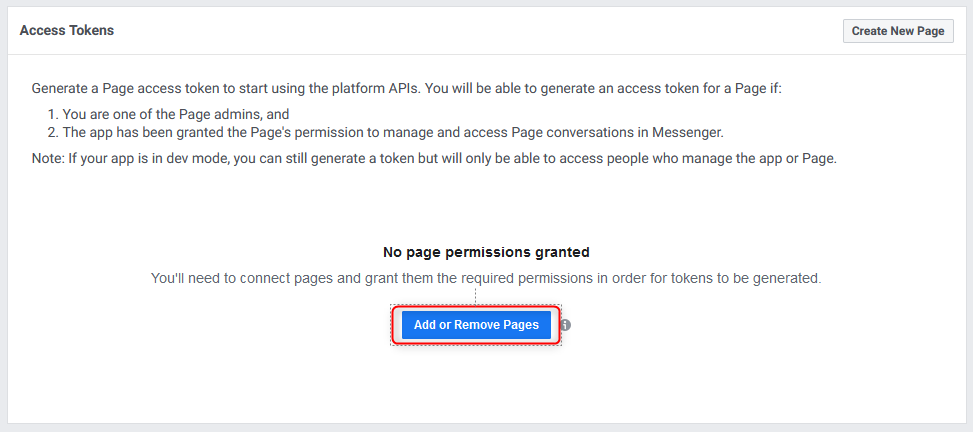
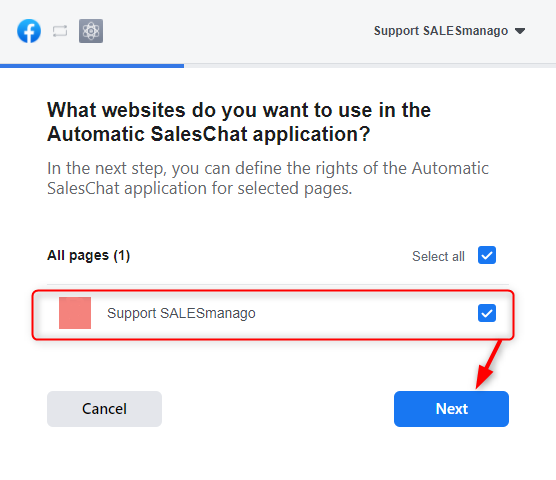
In the new window, select the page where you want to run the bot, and then click Next.
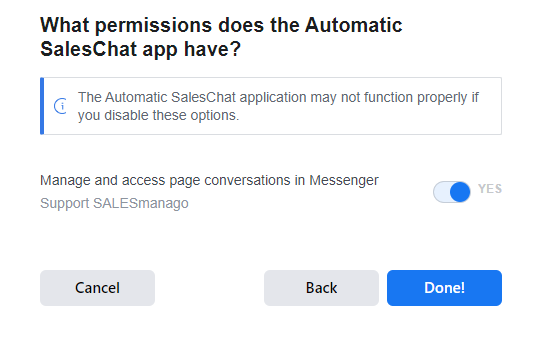
Allow the app to manage page conversations in Messenger and click Done:
If you have correctly granted the application permission, the following window will appear:
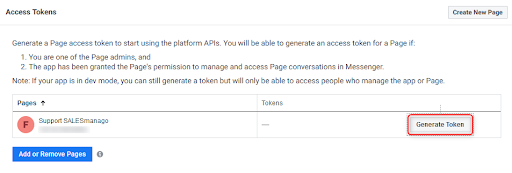
Click Generate Token.
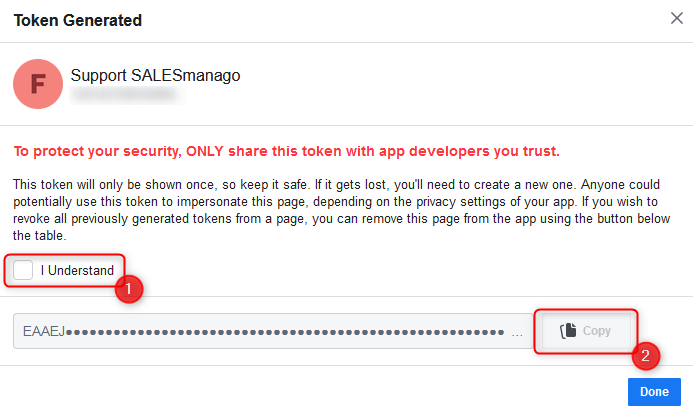
In the above window, select [1] I understand, and then [2] Copy your token. Paste it in the SALESmanago website access token window, described in the section Integration settings from SALESmanago level.
IMPORTANT: The bot will be inactive until you enter the token into SALESmanago.
The next step is to select a website with an integrated bot in the Webhooks tile:
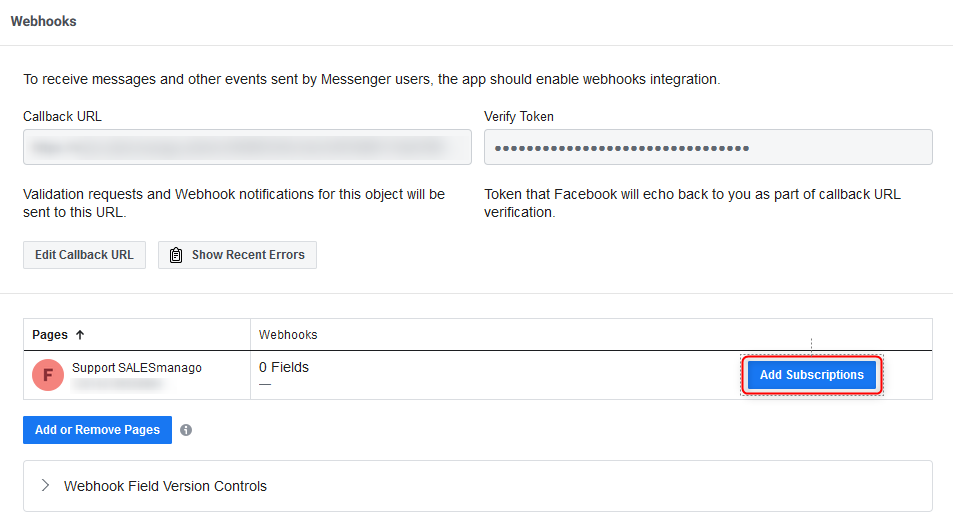
Click the Add subscriptions button, then select the Webhooks (subscription fields):
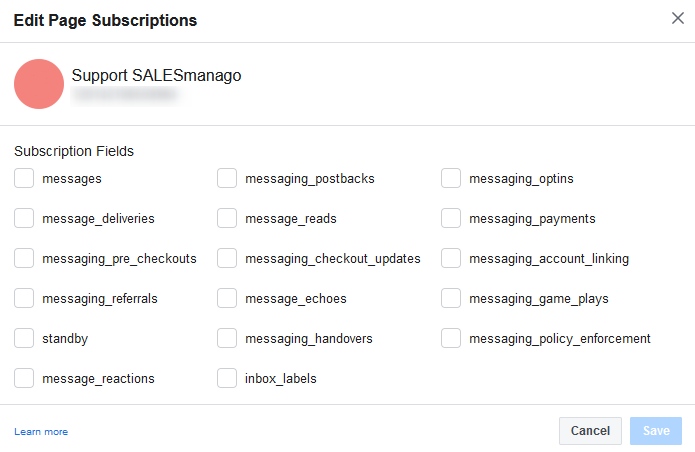
For the bot to work properly, you need to select messages and messaging_postbacks. Click the Save button.
If you want your bot to be available to other Facebook users, enter the privacy settings.
Go to Basic Settings. You will find them in the side menu:

And then enter following information in the window:
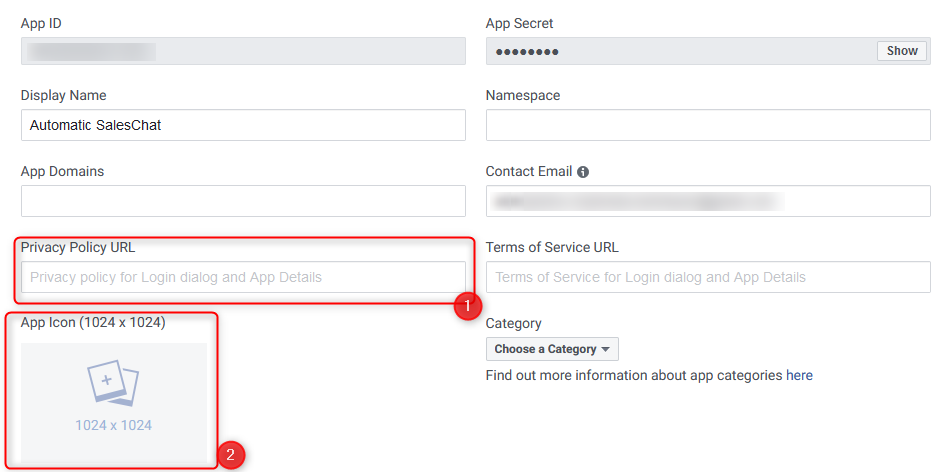
Enter [1] The Privacy Policy URL of your website. If you do not have such an address, create one – it is required to share the application with others. Then add an [2] App Icon. Finally, save your changes.
IMPORTANT: Remember to set the Purpose and Category of the website. Without these two options, you won’t pass Facebook verification later.
The application must be approved by the API interface, to do this, select Permissions and Features in the side menu:

In the list, find the pages_messaging permissions and click Request. This will allow the bot to answer questions.
In order for the bot to work properly for other users, it must be authenticated. “Request” will be replaced with “Continue”. Click it to proceed to the Access Request.
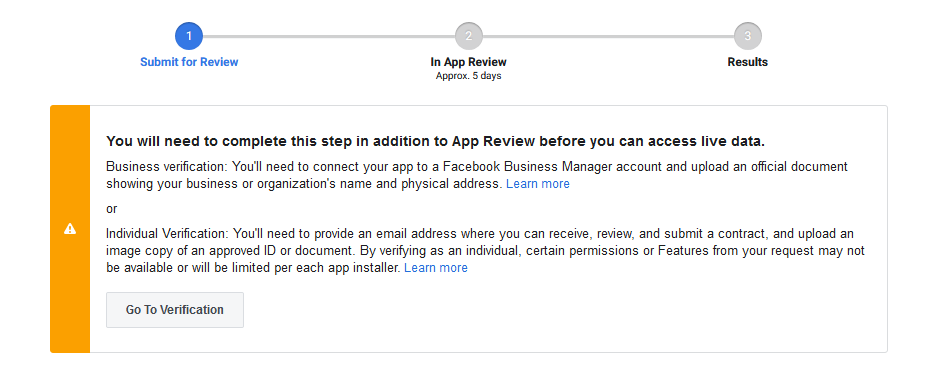
Follow the instructions from Facebook Developers to access Automatic SalesChat.
For a bot to work properly, it has to be approved by Facebook. Below Current Submission, click Edit Notes.
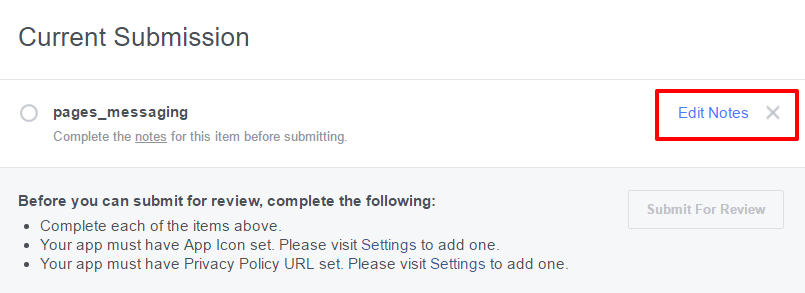
The pop-up where you need to insert a bot data from script, will appear.
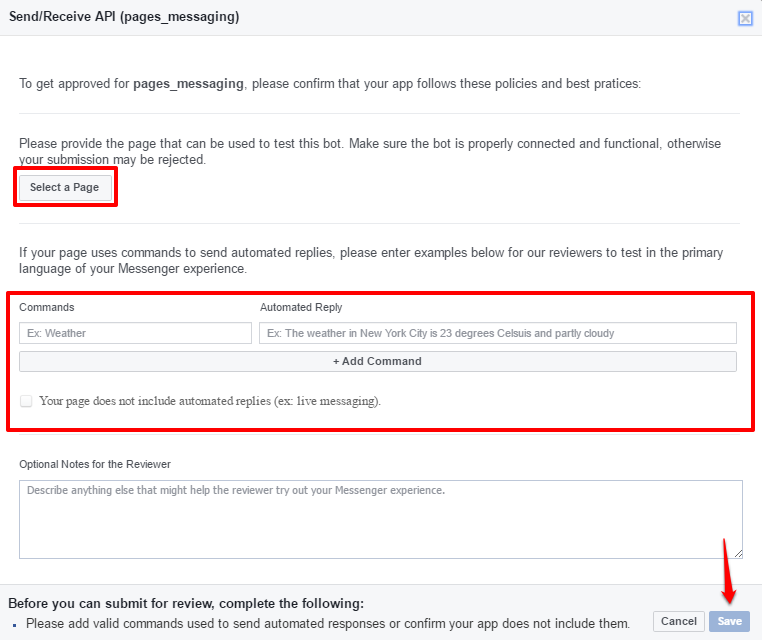
Select a Page, the same as you have chosen in previous settings. Type exemplary Commands and Automated Reply of the bot, the ones that you have set in the SALESmanago system. To add more commands press +Add Command. Getting an app approved by Facebook takes up to 5 working days.
IMPORTANT: Insert the same commands and replies that you have set for your bot in SALESmanago. If data is different, Facebook will not approve the bot.
The last step is to make the bot public. On your Facebook developer accounts, go to App Review and set the switch to Yes.
.