


In the Campaigns and Funnels section, you can create and implement the sales procedures. Effective management of the chosen sales model requires a set of procedures to be designed and implemented within the sales process. The entire sales process is divided into phases based on the stage of the commercial negotiation and the likelihood of signing a contract (it increases as the negotiation progresses to more advanced stages). All sales operations can be presented within the sales funnel. The sales process involves moving prospects to higher levels of the funnel (after they have fulfilled certain conditions) until a contract is signed, i.e. a prospect becomes a project. According to the phases, the sales pipeline analysis allows for an ongoing analysis of the sales staff performance. A typical pipeline will have a large number of commercial offers at low stages of the sales process, and a small number of prospects at high levels.
HOW TO START
A. Add a new campaign and create a new sales funnel
B. Manage the contact flow between funnel stages.
A. ADDING A NEW CAMPAIGN AND CREATING A NEW SALES FUNNEL
To add a new sales campaign – a funnel – go to CRM => CAMPAIGNS AND FUNNELS => Add new funnel.
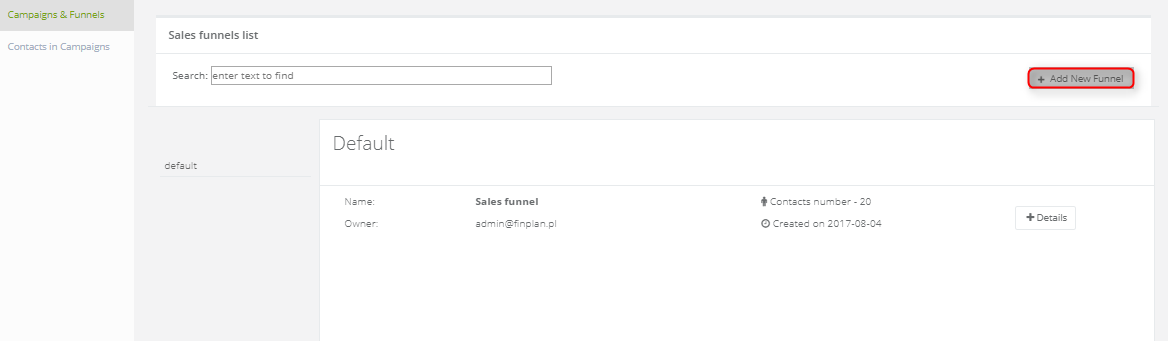
Upon clicking, a new screen will appear where you will be able to add a new campaign:

[1] Sales funnel name – identifies the funnel in the system.
[2] Default Potential Value – here you can define the value of each contact in the funnel. Determining this value is useful for statistics purposes if you collect this type of data. You can estimate the income you can get from a particular contact.
[3] Group – is used to keep the system in order.
Stages – here you can determine the stages (the track) of the sales campaign, between which the contacts will be moved. To add a new funnel stage, click Add.
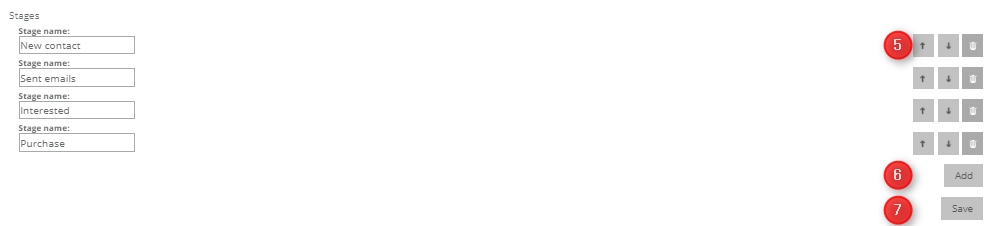
[5] You can change the order of the stages using the arrows. You can remove a campaign stage using the trash bin button.
[6] Add – this button allows you to add new stages to the campaign.
[7] Save – save the created campaign.
B. MANAGING THE CONTACT FLOW
To assign contacts to a campaign:
- Create a sales funnel. The sales funnel is one of the simplest tools used for analyzing sales. As a consequence, it also supports sales management.
- Decide how to assign contacts to the funnel:
manually
- in the contact card- add a contact to a new funnel or move a contact to a particular funnel stage. More >>
- through contact management – assign a greater number of contacts at once. More >>
- through RFM analytics – assign contacts basing on their shopping preferences. More >>
automatically
- using automation rules – assign contacts to a funnel as a reaction to a chosen activity on the website. More >>
- using workflow – assign contacts while creating the Lead Nurturing process. More >>
SALES CAMPAIGNS – DETAILS
When you add contacts to a sales campaign, the preview of the campaign changes.
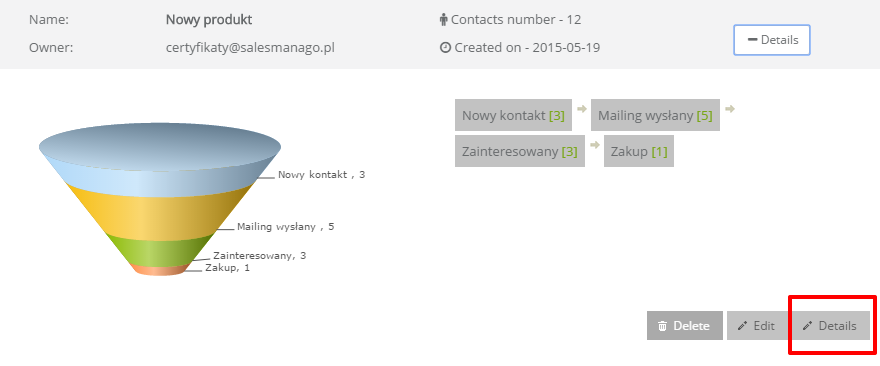
After expanding the campaign view, you can see information on the number of contacts in an each campaign stage. To access further campaign analysis, click the DETAILS button.
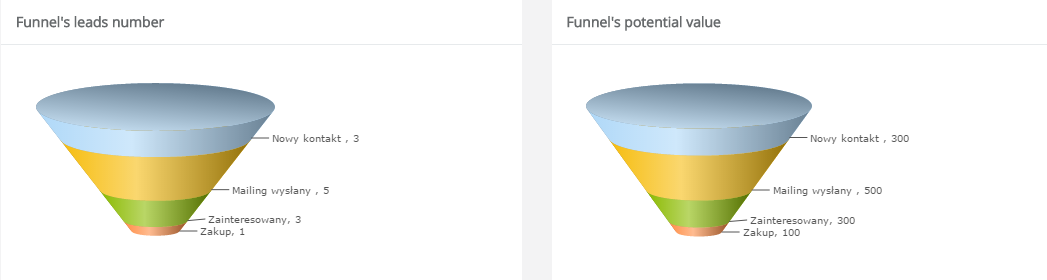
Sales campaign analysis
When determining the value of the contact in the sales funnel, you will see two graphic representations of the funnel. The first funnel (number of leads in the funnel) shows the number of contacts at each stage. The second funnel (potential value of the funnel) presents the value of contacts at each stage.
In the SALES FUNNEL ANALYSIS section, you can view detailed information on each level of the funnel. These details relate to:
[1] The source of the visit
[2] Searched phrases
[3] UTM Analytics – it can be limited to the following parameters: source, source/medium, medium, source/campaign, medium/campaign [4].
The entire data show the contacts’ activity within a specific stage of the campaign. This means that you can track the sources from which the contacts at a specific stage access the website.
Below you can see the COMPARISON OF CAMPAIGN STAGES section – it allows you to check the contact flow within the defined levels, taking into account the time variable.
[5] Owner – select contacts you want to analyze by choosing the contact’s owner.
[6] Period – select the period you are interested in: a week or a month.
[6a] define the exact time range to be analyzed.
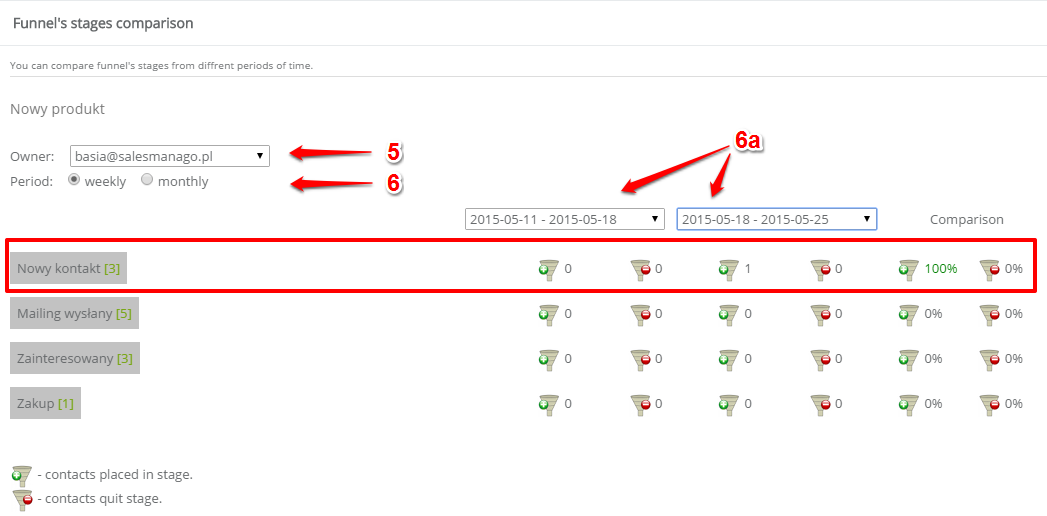
Short analysis for the New contact stage (marked by the red frame):
Between 11 May 2015 and 18 May 2015 no contact has entered the New contact stage, while in the week from 18 May 2015 to 25 May 2015 one new contacts have arrived to this level. This is why the Comparison section shows an increase of 100%, marked with green. During this period of time no contact has left this stage to enter another level. This is why the icon presenting the exiting contacts in the Comparison section indicates 0%.
NOTE: analytics are available from the last 3 h.
PREVIEW OF CONTACTS IN A CAMPAIGN
To view the contacts used in a specific sales campaign and their stage, go to CRM ->SALES FUNNELS.

[1] Owner – select contacts you want to check by selecting the contact’s owner.
[2] Funnel – select the funnel for which you want to display the contacts.
[3] Stage – you can filter the contacts by funnel levels.
[4] Details – by clicking this button you access the chosen contact card.
READ MORE:
HOW YOU CAN USE SALES FUNNEL – EXAMPLE
Submit your review | |