


Useful links
A landing page is a standalone page, distinct from the main website, designed with a specific goal in mind, most often converting anonymous traffic into leads. Use landing pages to gather contact details from website visitors and convert anonymous traffic to leads.
Benefits:
- generating traffic on the website
- a possibility of using landing pages for the A/B testing
To create a form in the advanced wizard, you need to go to
LEAD GENERATION => LEAD GENERATION => LANDING PAGE
Contents
- New landing page
- Choose the type of a creator
- Create a form in Drag&Drop designer/ Create a form in HTML editor.
- Create Thank you page / Create Redirection to another page
- Preview
- Create Confirmation email
- Options
- Final settings
1. New landing page
After you Arrive to Generate contact section, choose Landing page on your left-hand side.
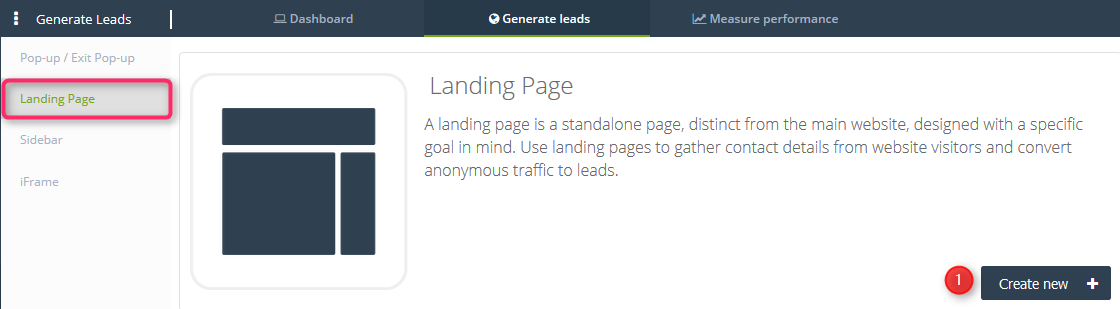
[1] Create new + click this option to start the process.
The process consists of 7 steps which are presented in the picture below:

[1] New landing page – this is the stage that begins the process of creating the form, during this step you can choose the type of editor in which you will create the form.
[2] Creator/HTML – in this step, you will create your form.
[3] Thank you page – in this step, you will create Thank you page which will display once the user fills in the form on the landing page.
[4] Preview – in this step you can preview the created landing page.
[5] Confirmation email – in this step, you can design your confirmation email which will be sent after the user fills in the form.
[6] Options – in this step, you can assign a tag to the acquired contacts and you can set the option of sending a notification if the contact fills in the form on the landing page.
[7] Final settings – this is the final step in which you will choose how you will publish the landing page, how long it will be available and when it will expire.
2. Choose the type of a creator
After you fill in all necessary fields, choose the type of editor in which you want to create the form.

[1] Landing Page name – type in the name you have chosen for your landing page.
[2] Select the main owner of new leads – from the dropdown list choose an email address of the new leads.
[3] Please enter your Google Analytics ID – you can enter your Google Analytics ID in order to receive statistics of the created pop-up on your Google Analytics dashboard. To find your ID, you need to log into your Google Analytics account, choose Account column then select an account on a dropdown list. Next, you need to choose the service in the Property column and click Tracking Info → Tracking Code.
[4] Share this landing page – select this checkbox to share this landing page.
[5] Create landing page in Drag&Drop Creator – select this option to customize the layout of the form easily.
[6] Create landing page in HTML editor – select this option to work in HTML editor.
3. Create the form in Drag&Drop Creator

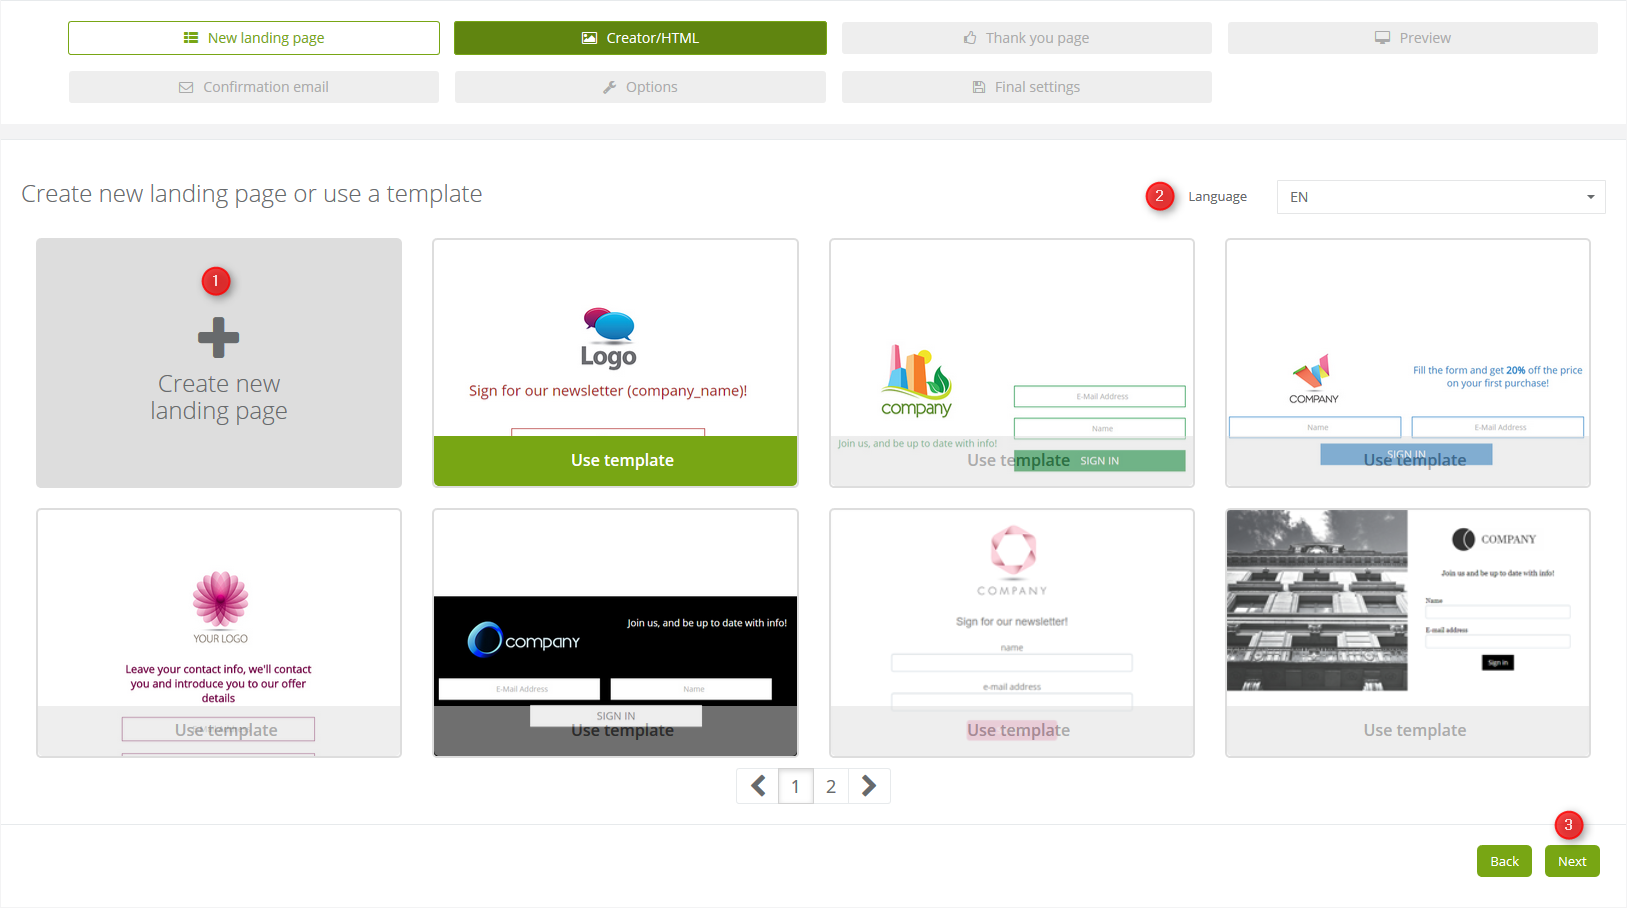
[1] Create a new landing page – click this option if you want to create a landing page from the scratch.
[2] Language – select one language (Polish, English, German, Russian, Spanish).
[3] Next – click to continue.
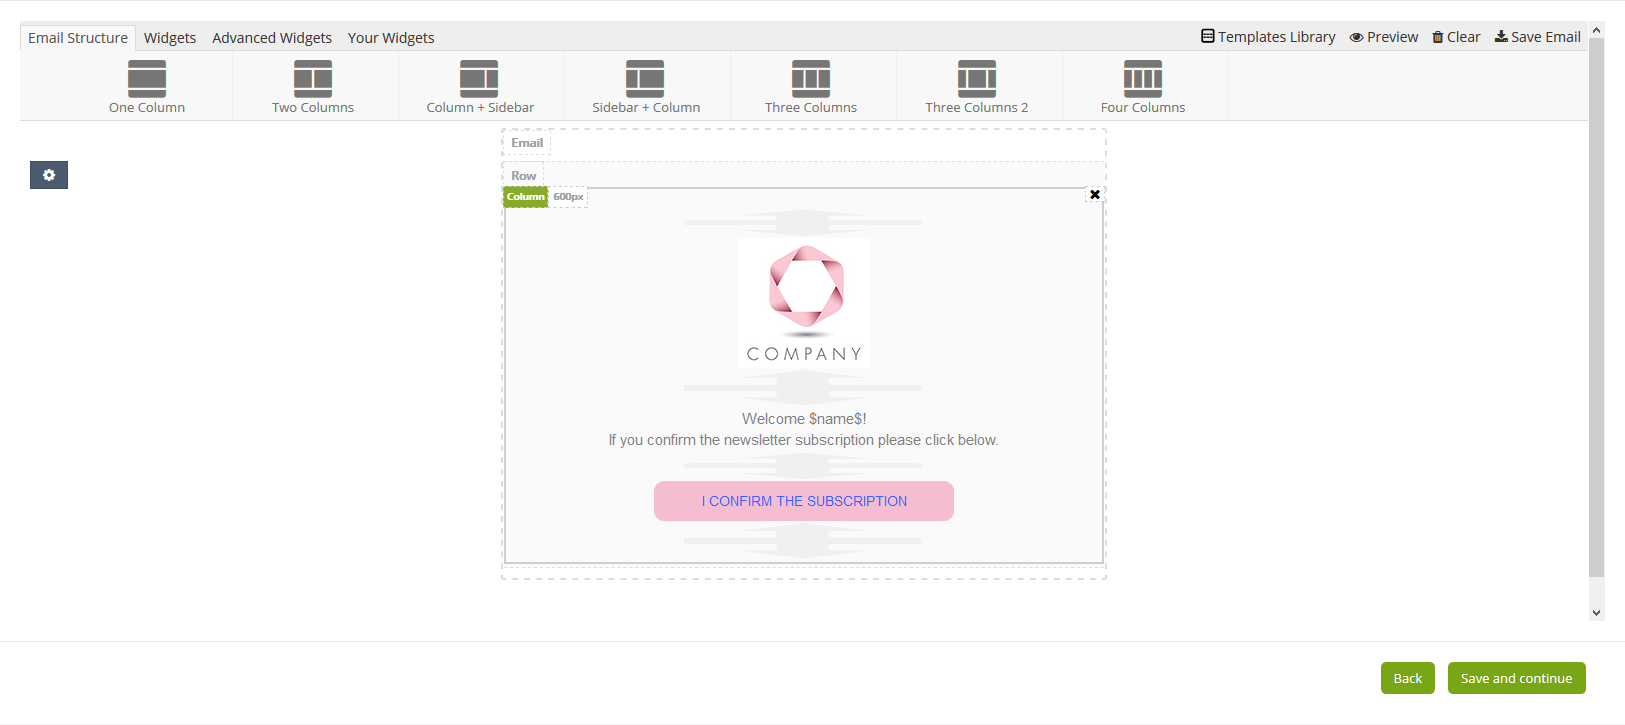
After you click Create new landing page or if you choose a ready-made template, you will see the following view. On this stage you can choose the structure of the landing page, its widgets, advanced widgets or widgets which you already created and saved. You need to click the element, drag and drop it in the place of your choice.
Learn more about widget settings.
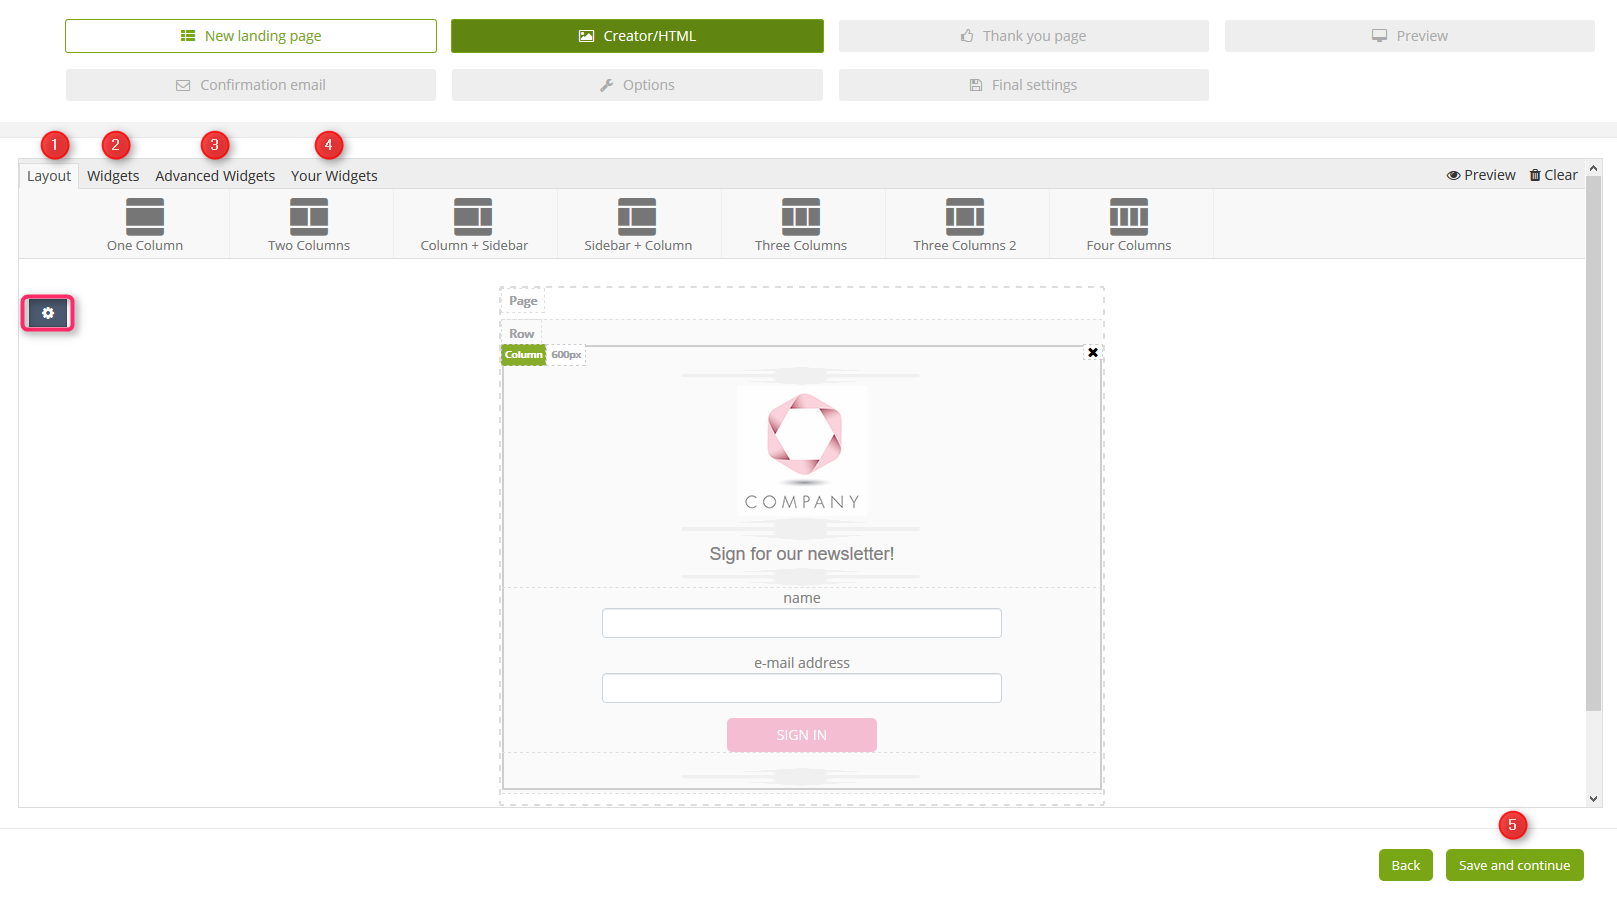
[1] Layout – in this tab you can choose the layout for your landing page, e.g. one column, two columns, etc.
[2] Widgets – in this tab you can choose a heading, text, an image, a divider, margin, button, contact form and a social media.
[3] Advanced Widgets – you can find here developed widgets such as an image+text, a product frame, a menu and a banner.
[4] Your Widgets – this is the place where you can find widgets which you once have created and saved.
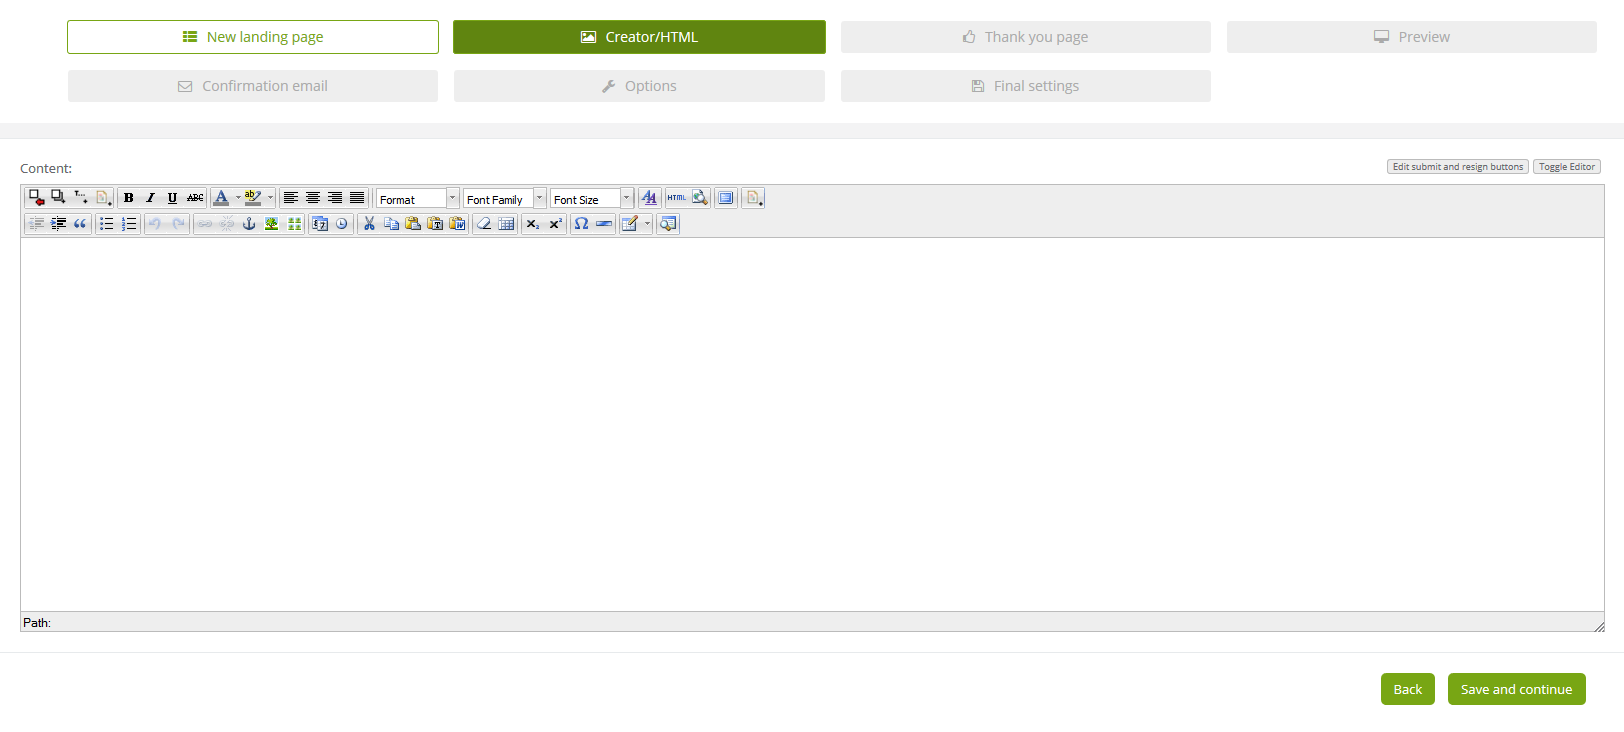
Create the form in HTML editor
In case of HTML editor, you will see the following view:
[1] Create a new landing page – click it to create the new landing page in HTML editor.
[2] Language – click to change language, you can choose from Polish, English, German, Russian and Spanish.
4. Create Thank you page
After you successfully created a landing page form, the next step is designing Thank you page or setting redirection to another page.
Thank you page is a web page where subscribers are immediately redirected after a subscription. If you choose Redirect to another page, the user will be redirected to the URL address of your choice.
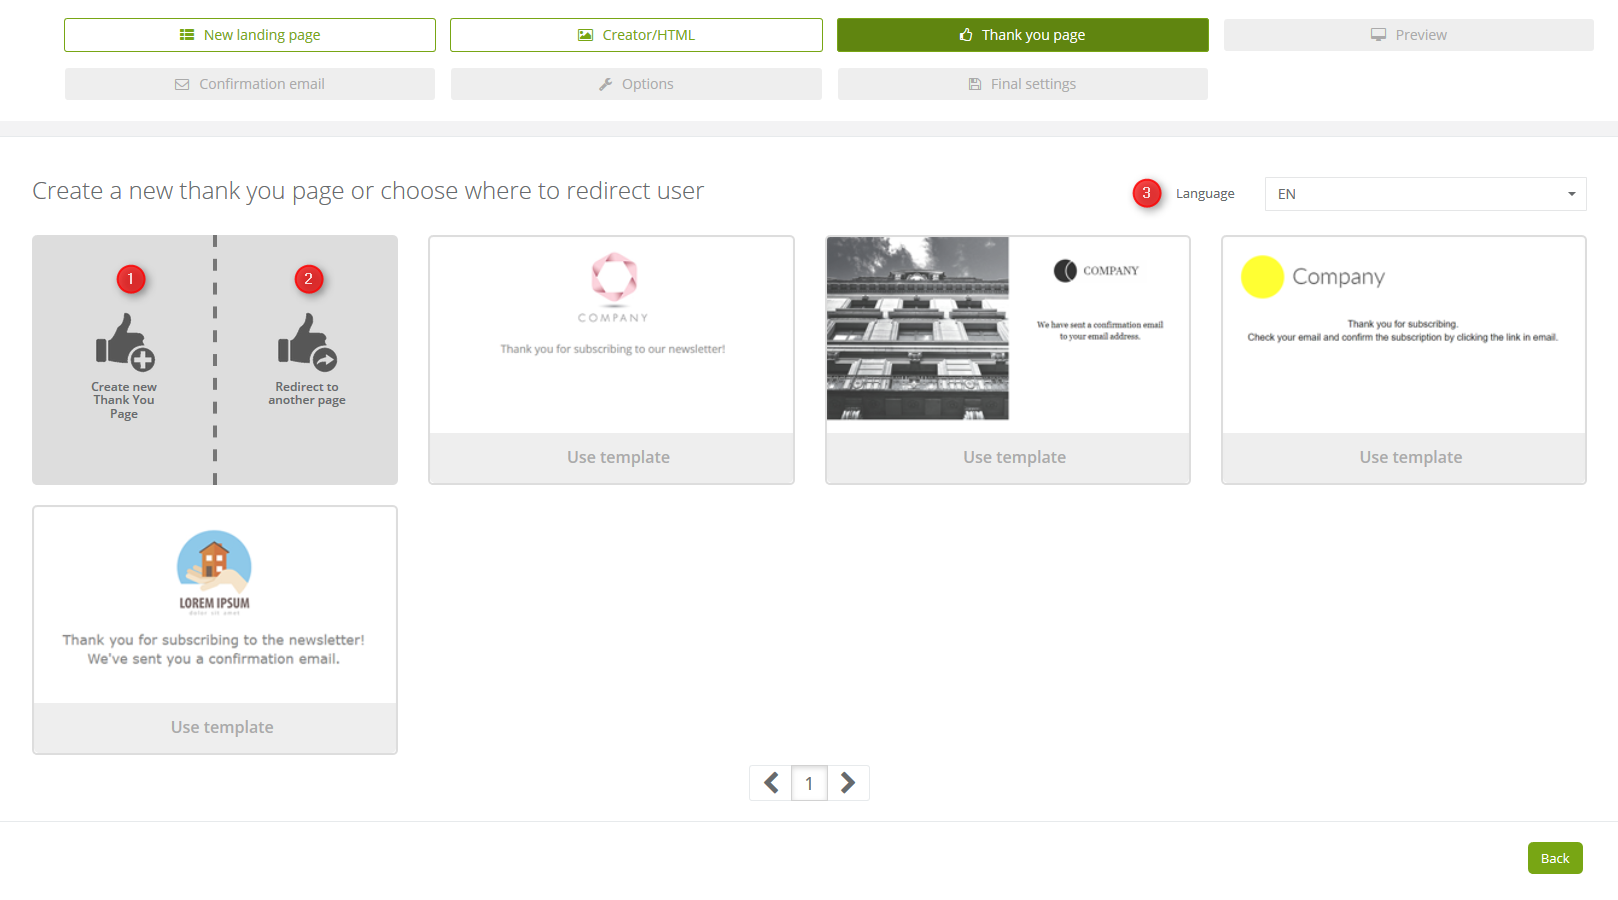
[1] Create new Thank you page – click it to create thank you page either in Drag&Drop Creator or HTML editor (it depends on which one you have chosen in the beginning).
[2] Redirect to another page – click it if you want to redirect the user to the specific website.
[3] Language – click to change the language (Polish, English, German, Russian and Spanish).
While you create Thank you page in Drag&Drop Creator, you will be able to use the same elements which you used when you designed your landing page. So you can create the structure and fill it with chosen elements.
Redirect to another page
Instead of Thank you page you can redirect the user to another page:

[1] Please select an existing landing page – choose from the list an existing landing page, if you have already created it and saved.
[2] Please enter a different URL – type in here a URL address to which the user will be redirected.
[3] Next – click to continue.
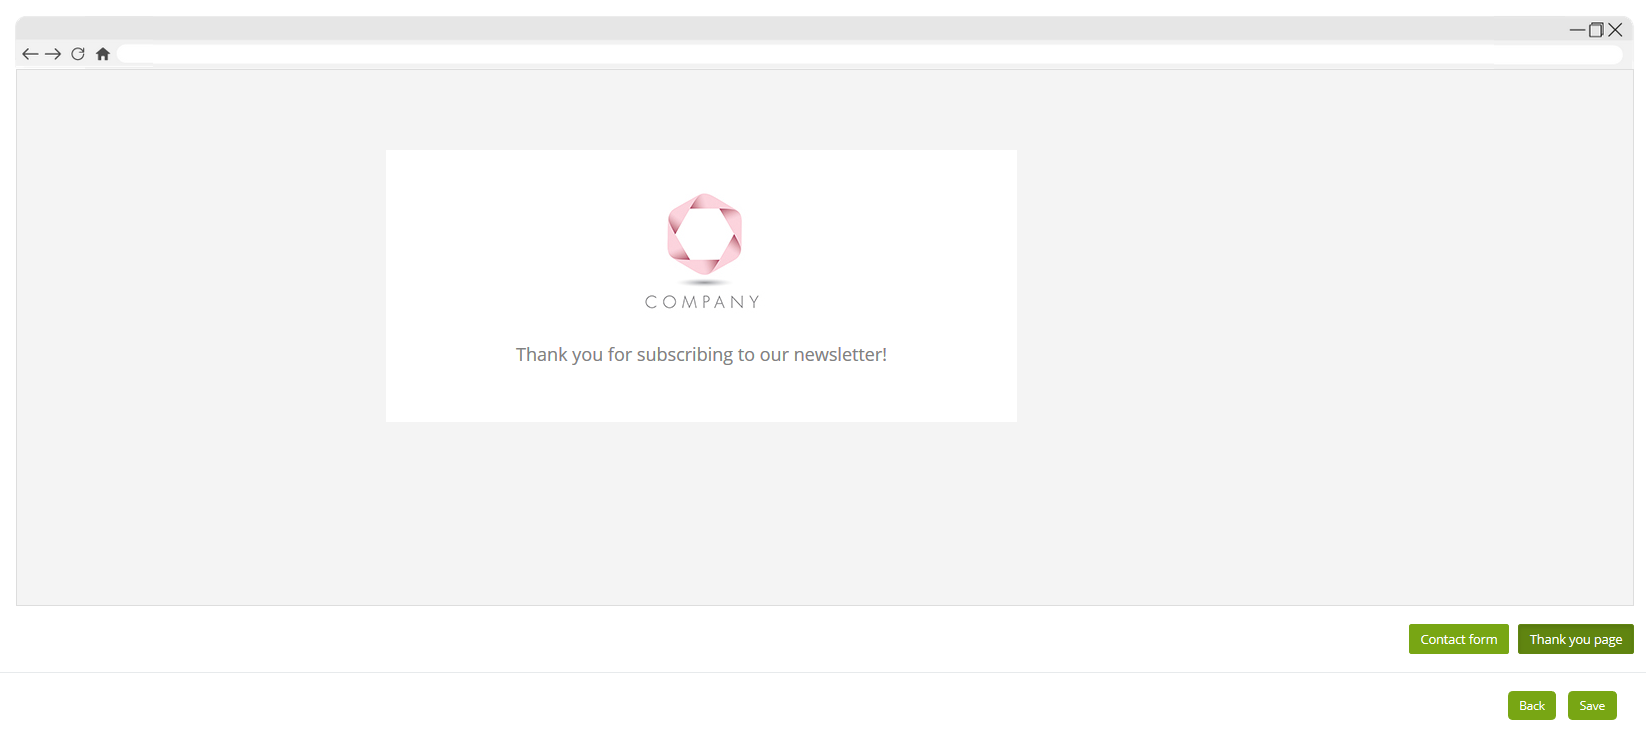
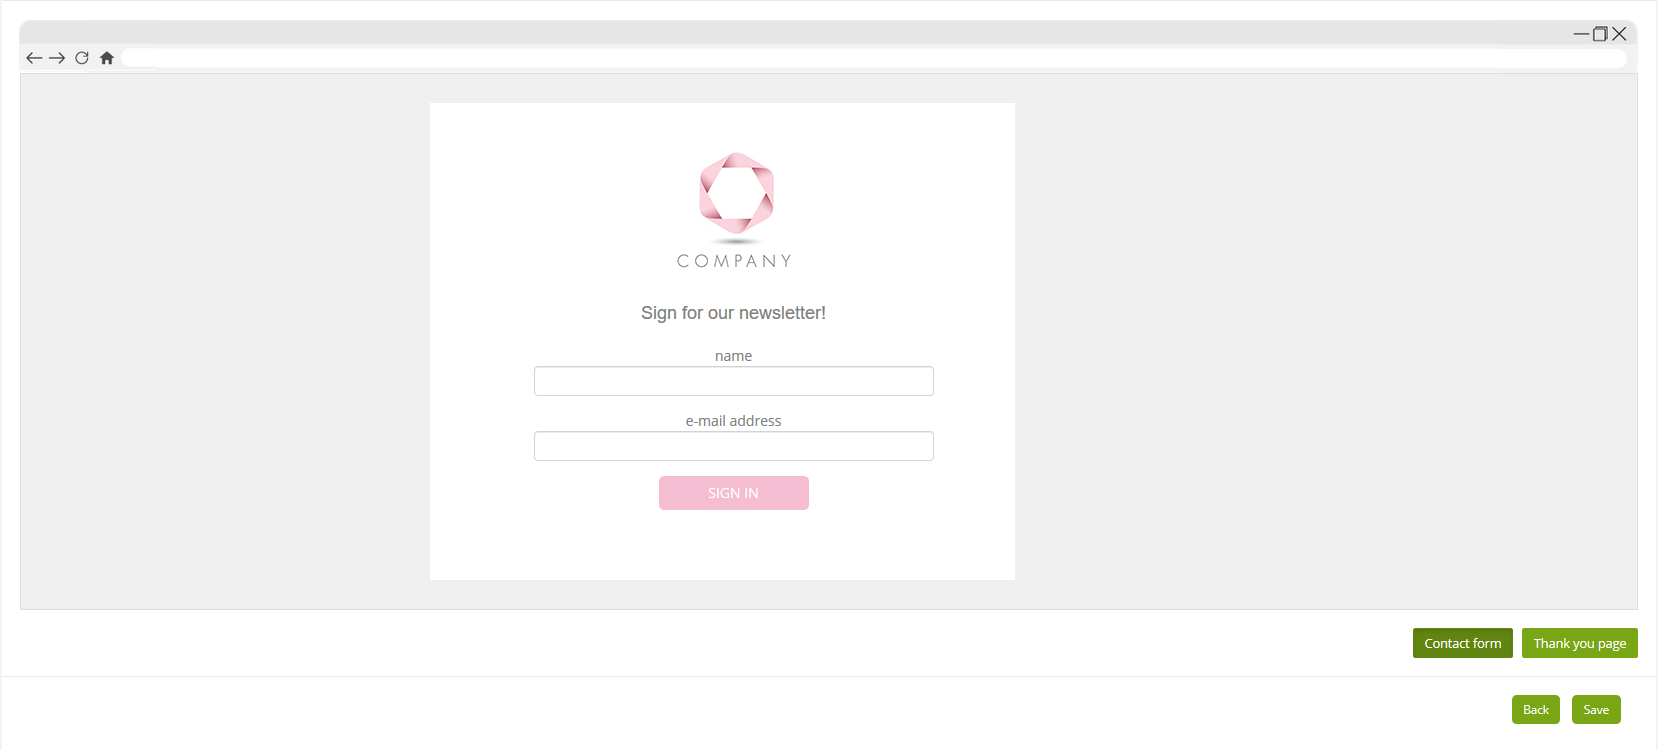
5. Preview
After you completed the design of the landing page form and thank you page, you can see how the content will look on the website. Below the window, click Contact form or Thank you page to see the preview of one of them.
6. Confirmation email
To make sure that the contact has been successfully saved in the system, you need to send a confirmation email. You can create it here in this step.
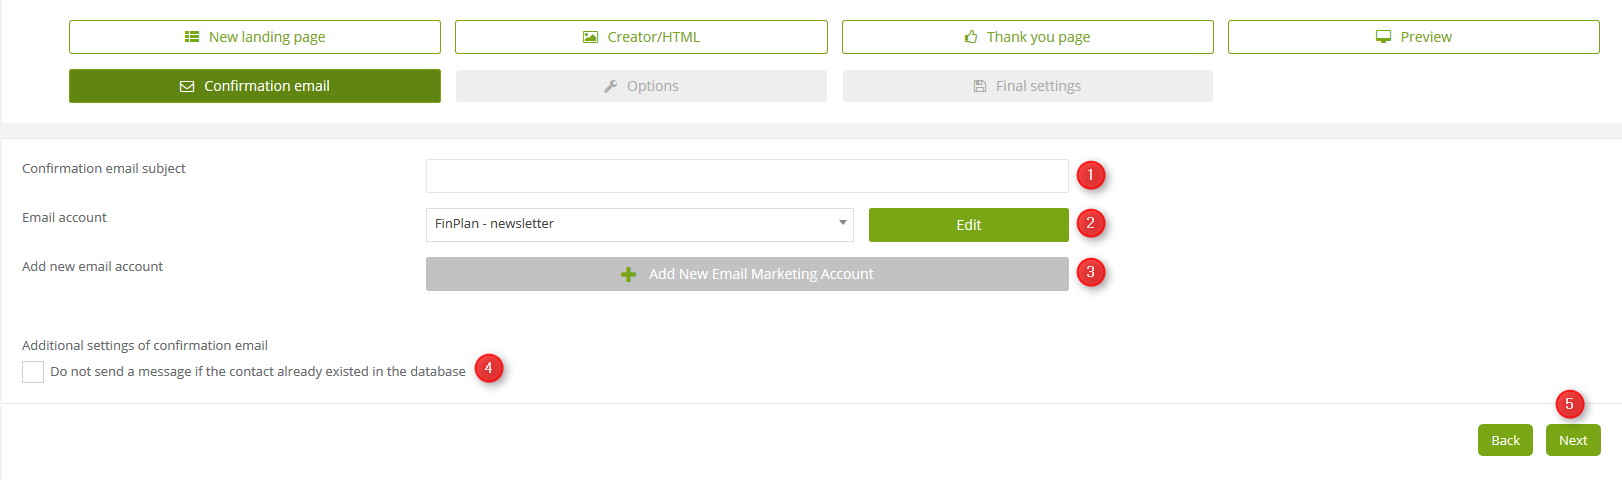
[1] Confirmation email subject – type in the subject of the email.
[2] Email account – choose an email account from which mailing will be sent.
[3] Add new email account – if you click it you will be able to create a new email account quickly. Then you will be able to use this new account to send mailing from it.
[4] Additional settings of a confirmation email – tick the checkbox, if you don’t want to send an email to a contact which you have already in your database.
[5] Next – once you’re done in this step, click the button to continue.
Choose the creator in which you want to create the confirmation email:
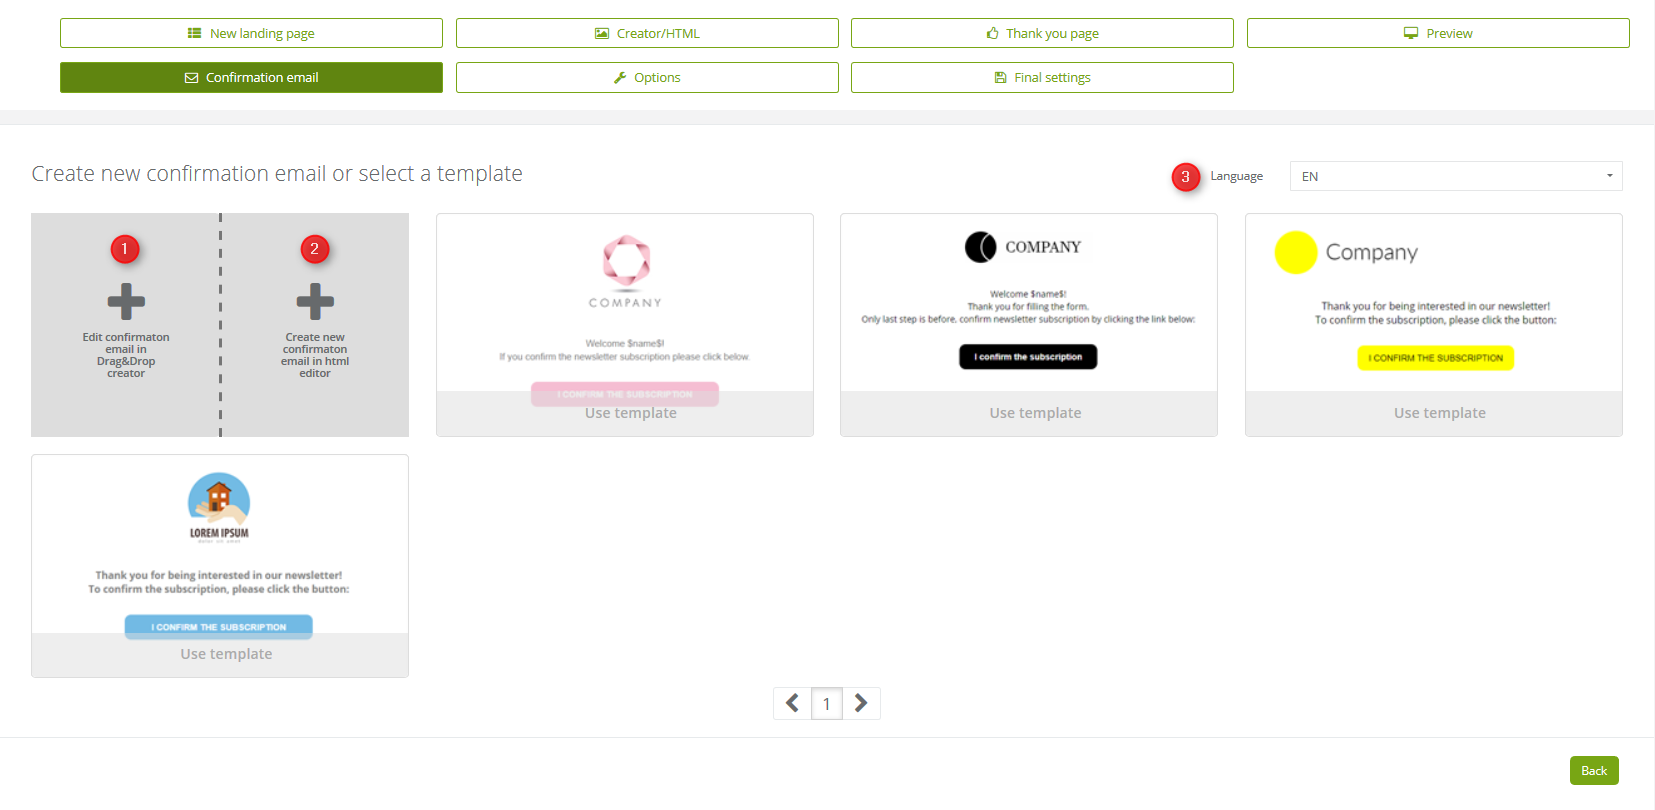
[Create new confirmation email in Drag&Drop creator] – select this option to work in Drag&Drop Creator,
[Create new confirmation email in HTML editor] – select this option to work in HTML editor.
[Language] – click to change the language (Polish, English, German, Russian and Spanish).
You can personalize an email by mentioning user’s name.
More on personalized emails and statements on the website.
In each email you need to include the link ($opt-in$) that confirms subscription. You can drag and drop it to the form or link any word. It is necessary because without it the user will not confirm the subscription.
7. Options
In this step you can:
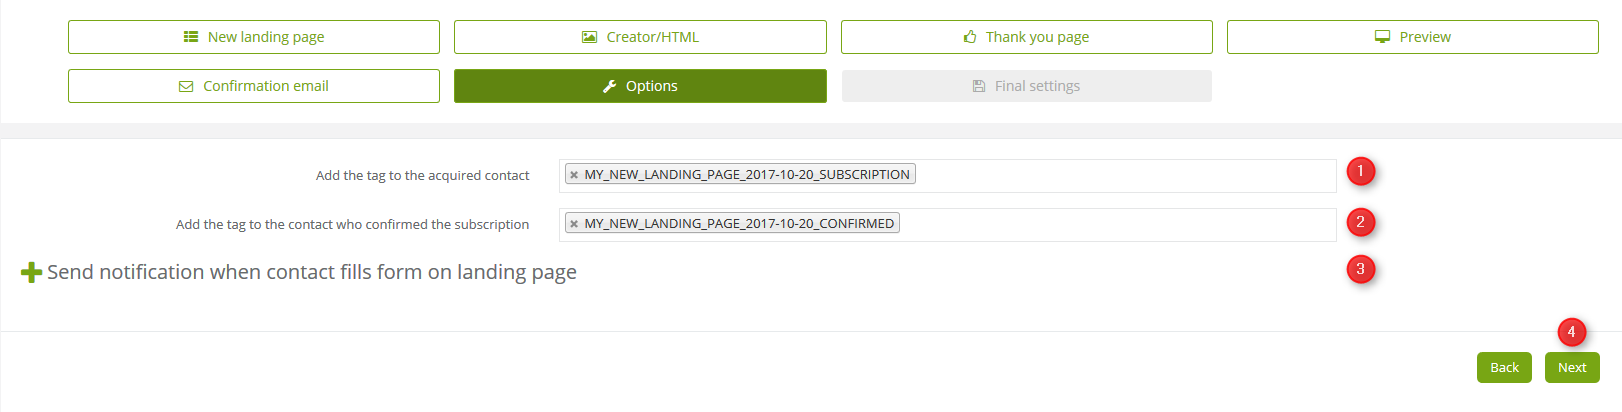
[1] Add the tag to the acquired contact – you can assign a tag to the contacts which you generate through contact forms.
[2] Add the tag to the contact who confirmed the subscription – you can assign a tag to the contacts which confirmed their subscription.
[3] Send notification when contact fills form on landing page – select this option to send notifications to the owner of the contacts when the contact fills in the form.
[4] Next – click the button to continue.
8. Final settings

[1] Where to publish your landing page – copy the landing page URL address to the clipboard, you can paste it on your website so the user will be redirected to the landing page after clicking this link.
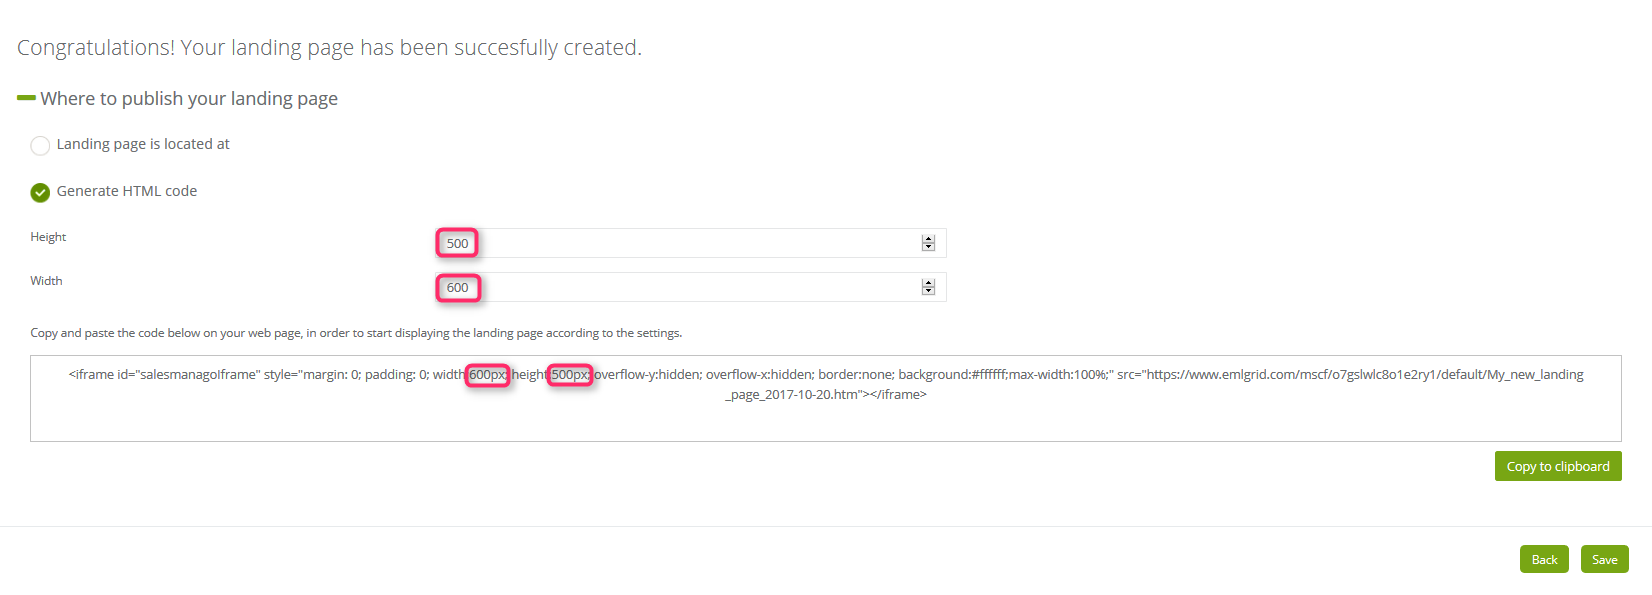
You can generate HTML code and the landing page will display after you paste the code on your website.
In Height and Width section you can adjust those parameters in the form and the data will be automatically changed in the code so you don’t have to do it by yourself. Once you’re done, click Save to continue.
[2] When to publish your landing page – set the availability of the landing page.
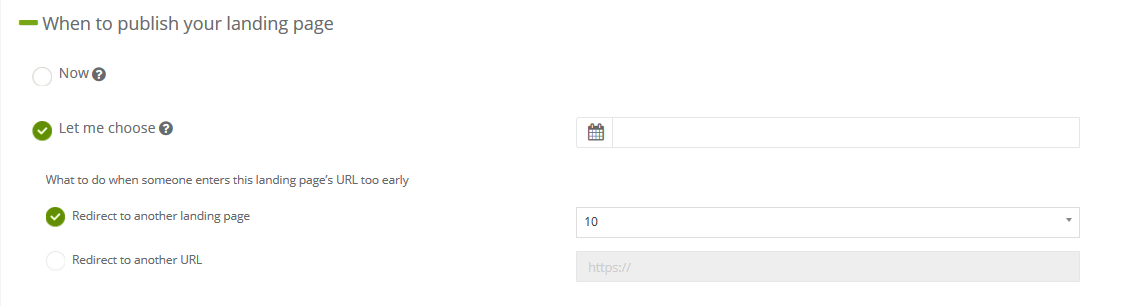
It can be available at once or you can launch it on the different date. If you choose the different date, when the customer goes on your website too early, you can set another landing page which will display instead of the new landing page until the day of its launching. You can redirect the customer to another page as well.
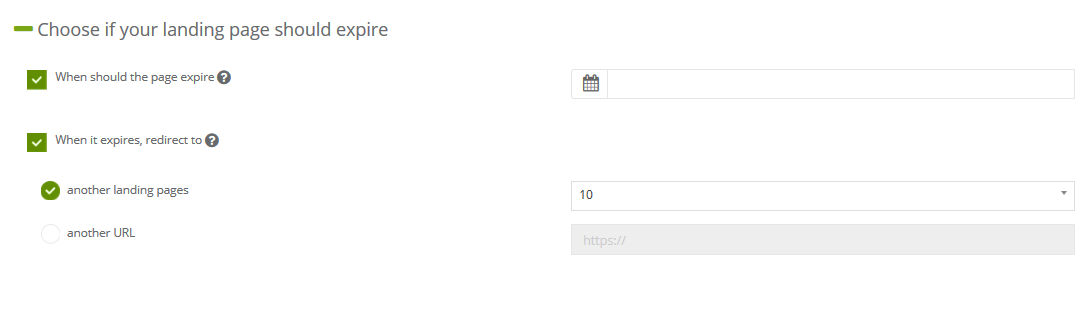
[3] Choose if your landing page should expire – set the exact time when your landing page expires and set the redirection for the customers to different landing page or any URL address.
This is the final step in the process, so click Save button to complete it.