


Useful links
The Iframe is a frame containing contact form placed on the website. Unlike the other forms, this one is static. In the SALESmanago you can create and set your own contact forms.
Benefits:
- you can place the form in any place on the website
- contact acquisition
- it can serve as a form that you can replace the other one which integration is too complicated
In order to create a form in the Advanced wizard, you need to go to
LEAD GENERATION => FORM => ADVANCED
Contents
- New iframe
- Creator / HTML
- Thank you page
- Preview & Settings
- Confirmation email
- Options
- Final settings
1. New iframe

[1] Iframe name – enter the name of the form that is necessary to be identified in the system.
[2] Select the main owner of new leads – choose the owner of the obtained contacts by the form.
[3] Please enter your Google Analytics ID – you can enter your Google Analytics ID in order to receive statistics of the created pop-up on your Google Analytics dashboard. To find your ID, you need to log into your Google Analytics account, choose Account column then select an account on an unfolding list. Next, you need to choose the service in the Property column and click Tracking Info → Tracking Code.
[4] Share this frame – select this option if you want this frame to be available to other users in the system.
[5] Create contact form in Drag&Drop Creator – you can select Drag&Drop Creator to design your Iframe. You can find more information here.
[6] Create contact form on HTML editor – you can also choose the HTML creator. You can find the instructions how to create the form in the HTML editor here.
2. Creator / HTML
After choosing one of the form editors, you will be redirected to this tab.

[1] Language –It is possible to change the language of the exemplary templates. Among them there are: Polish, English,German, Russian, Spanish.
[2] Create new iframe – you will be redirected to the chosen editor.
3. Thank you page
After filling in the form, a contact will be redirected to a page containing a thank you note. You can design it here or choose one of the templates or set a redirection to another website.
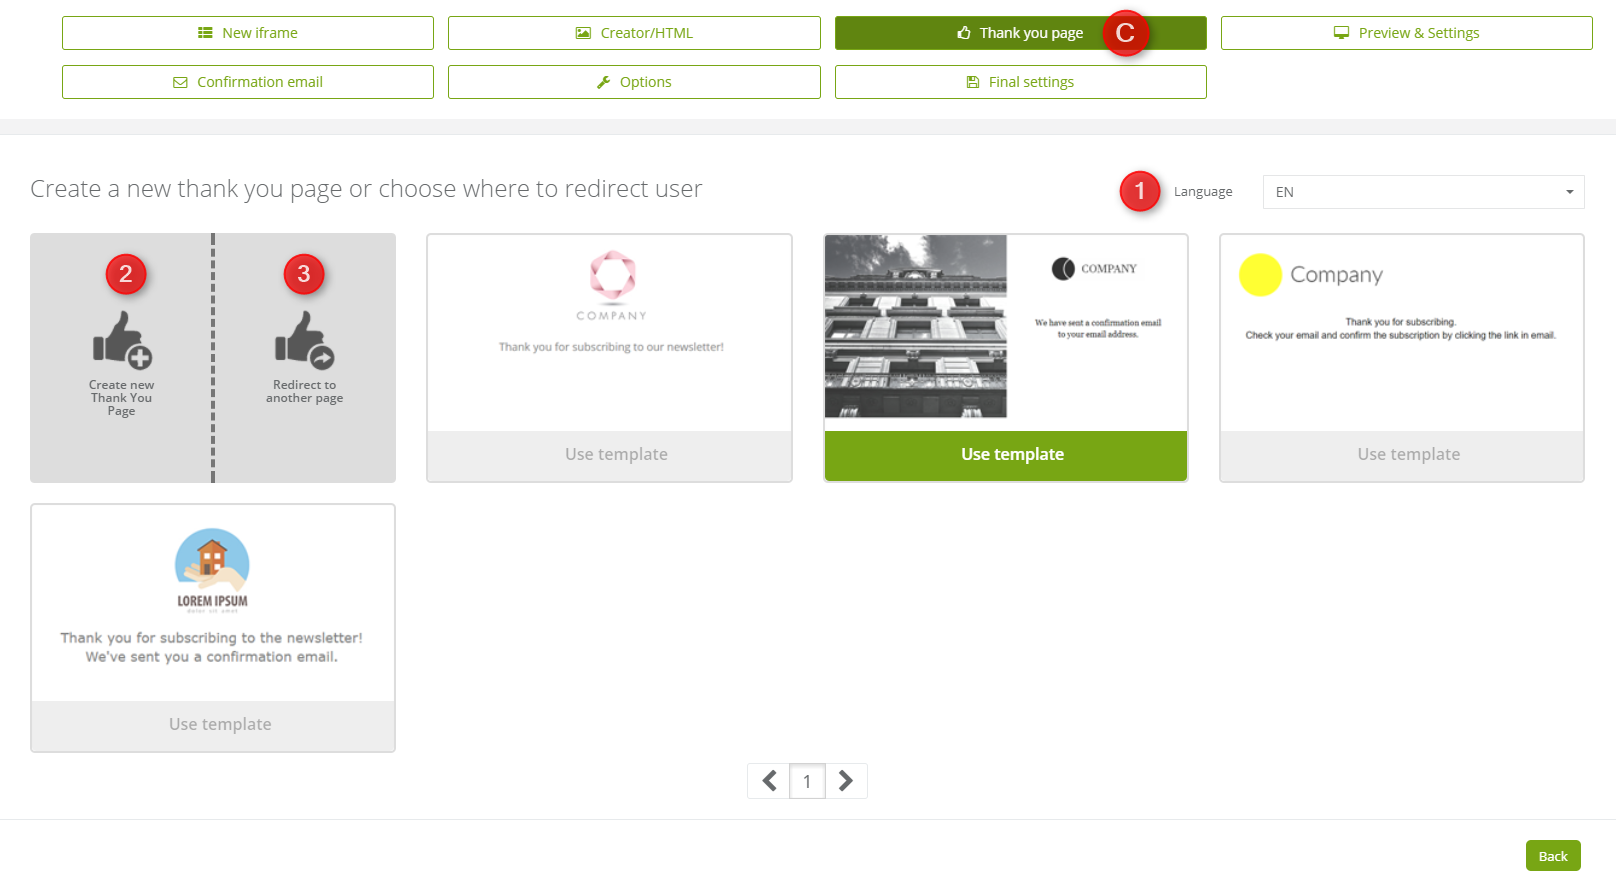
[1] Language –It is possible to change the language of the exemplary templates. Among them there are: Polish, English,German, Russian, Spanish.
[2] Create new Thank You page – after choosing this option we will be redirected to the editor.
[3] Redirect to another page – instead of designing your own thank you page you can select a landing page to which you can redirect the user.

[1] Please select an exiting Landing Page – contact can be redirected to the landing page that already exists in the system. Select one from the dropdown list.
[2] Please enter a different URL – if you want to set the redirection to a different website, not necessary created in the system, enter the URL address in the field.
After setting the redirection press Next.
4. Preview & Settings
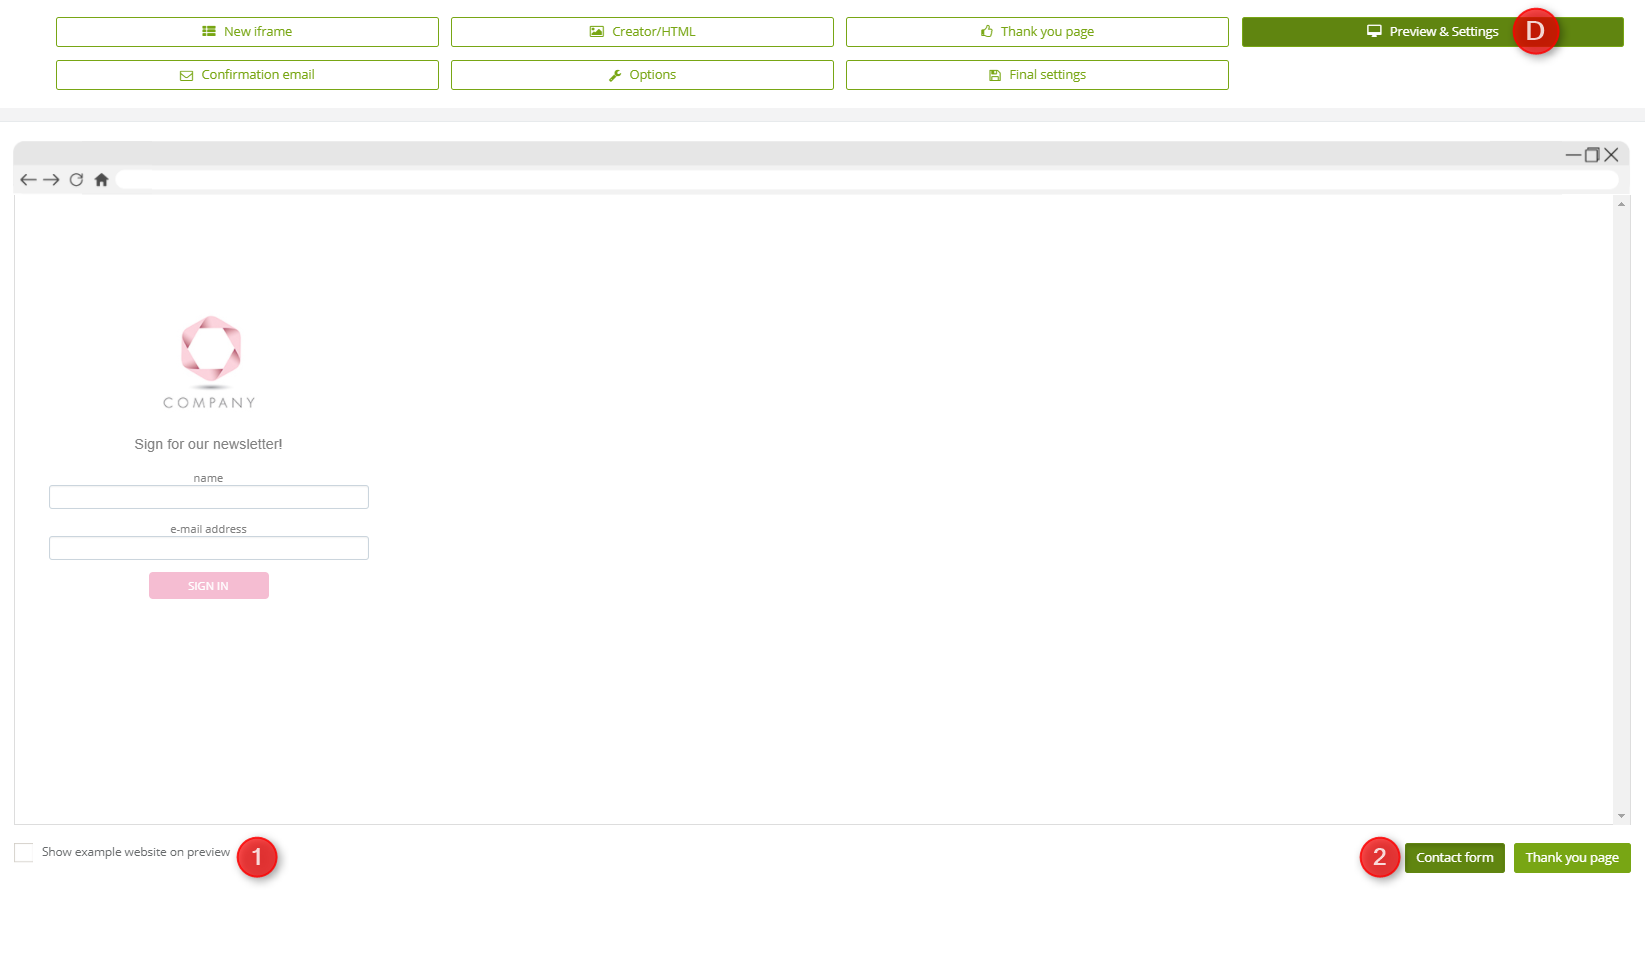
At this stage, you can see the preview of the created Iframe. The preview allows you to test the form whether it works and looks correctly.
[1] Show an example website on the preview – by selecting this option, you will be see the preview of the form on the example website.
[2] Contact form – click it to display the form on the example website. Do the same if you want to see the preview of Thank you page.
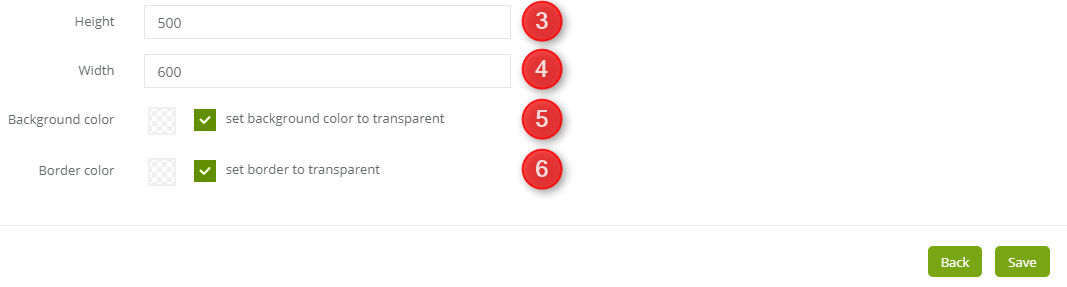
[3, 4] – you can set the width and height of the Iframe manually.
[5, 6] – you can choose the background and border colour.
If everything is set, press Next.
5. Confirmation email
After filling in the form, contact will receive an email with a confirmation.

[1] Confirmation email subject – insert the subject of the confirmation email.
[2] Email account – choose the email account from which the email is going to be sent.
[3] Add a new email account – create a new email account. You can find more information about it here.
[4] Additional settings of a confirmation email – if a contact has already been in the database and filled in the form, you can choose a Do not send a message If the contact already existed in the database option to prevent sending the message to the contacts that you have already in your system.
After setting a confirmation email account, click Next.

[1] Languages –It is possible to change the language of the exemplary templates. Among them there are: Polish, English,German, Russian, Spanish.
[2] Create a new confirmation email in Drag&Drop Creator
[3] Create a new confirmation email in the HTML editor
IMPORTANT: It is important to insert an opt-in link in the confirmation email. In order to insert an opt-in link in HTML editor, you need to type $opt-in$ or choose the opt-in the placeholder. In Drag&Drop Creator just drag and drop the Opt-in link widget.
6. Options
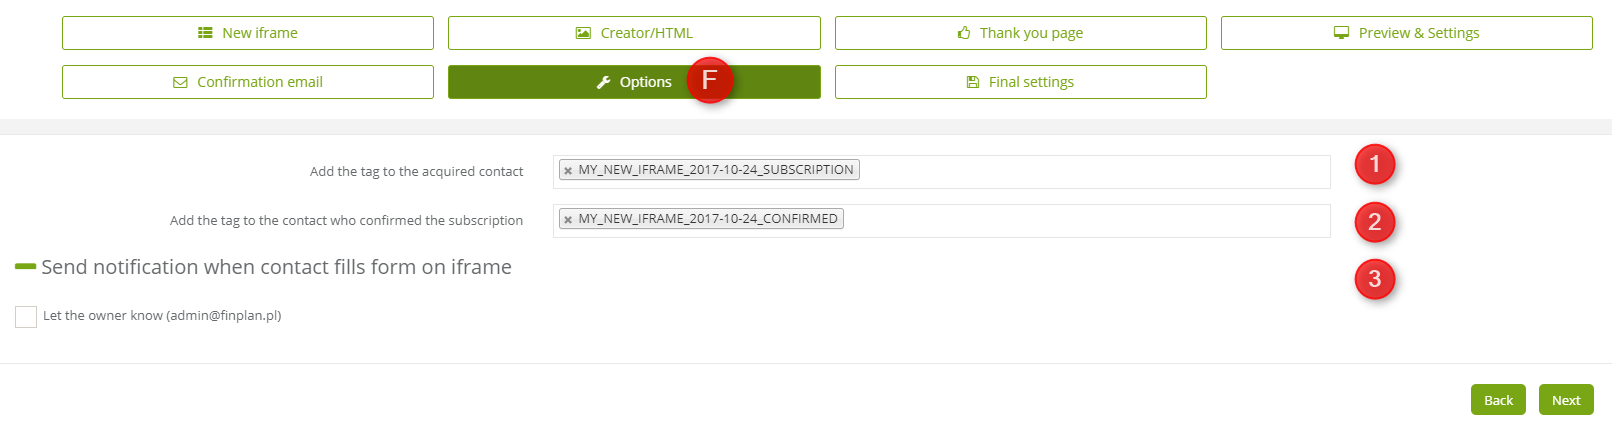
[1] Add the tag to the acquired contact – if the contact filled in the form, then the tag is going to be assigned to it automatically. Insert the name of the tag you would like to assign to the contact after filling in the form.
[2] Add the tag to the contact who confirmed the subscription – if the contact confirmed the subscription in the form, then the tag is going to be assigned to it automatically. Insert the name of the tag you would like to assign to the contact after confirming the subscription.
Important: we recommend inserting tags that will define the place of obtaining contacts. It is useful in Lead Generation Analytics where the information about the source of contact acquisition is required.
[3] Send notification when contact fills form on frame – after clicking the “+” sign the option, you can tick the checkbox Let the owner know.
Once you’re done, click Next.
7. Final settings
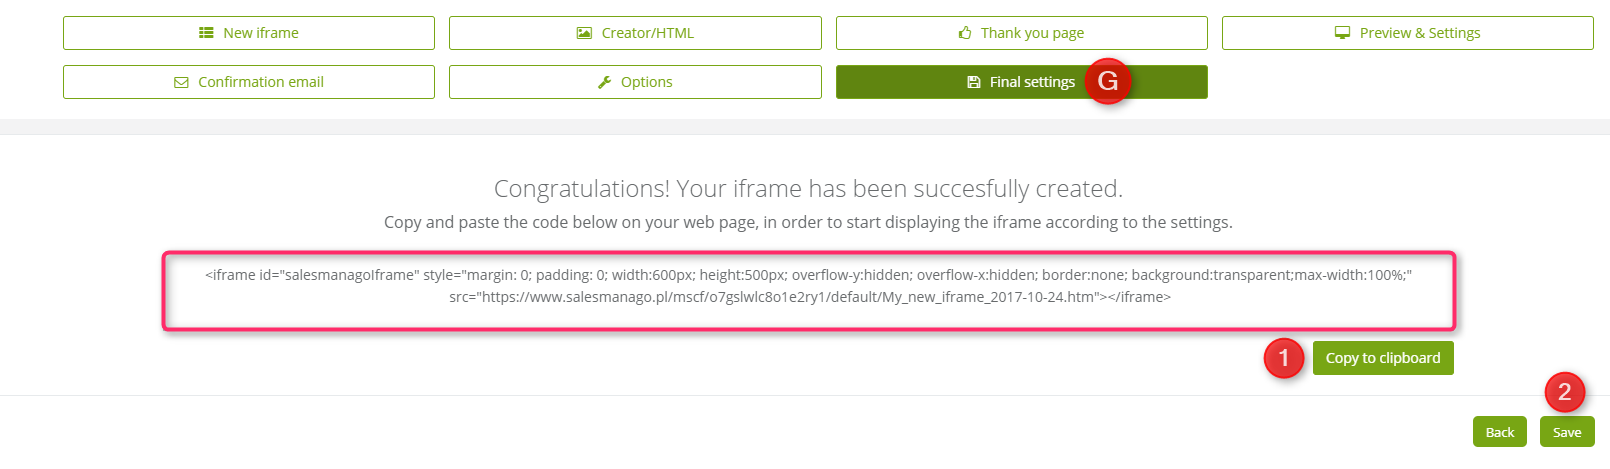
[1] Copy to clipboard – after adjusting all the settings, in the final settings tab, the frame code will display. Copy and paste the code on the website in the place you want it to be visible.
[2] Save – Once you’re done click the button.