


Thanks to Web Push and Rich Web Push notifications, you can reach your customers whenever they are online.
Web Push and Rich Web Push notifications (available on Google Chrome) allow for more effective communication with contacts in real-time. The content is sent to the user’s computer screen via the browser. Regardless of whether the contact is present on the monitored website, the information will appear regardless. The only conditions for this function to work are the consent of the contact to subscribe and the enabled browser.
IMPORTANT: With security considerations and the latest Web Push dispatch standards in mind, consent forms only display on certified sites (in the https domain).
You can only send Web Push and Rich Web Push notifications to people who have agreed to receive them via the consent form. When giving consent, the user does not have to leave us any personal data (e.g. email address), thanks to that, you will increase the number of your recipients many times over. Sending web push is not dependent on having a marketing consent -except from opt-in users, you will also reach unmonitored users with opt-out status, and even those who are not in the database and do not want to provide their data – it is enough to express consent to web push.
Consent forms work on both desktop and mobile devices, where they adapt responsively to the phone screen. Thus, depending on the device on which the user agrees, they will receive Web Push notifications appropriate to the device
The following is an example of a consent form for receiving Web Push notifications:

When the user agrees to receive notifications in the consent form, an additional browser message will be displayed on their device. Notifications are sent via the browser, therefore, due to the possibility of modifying the form and attractiveness of the Web Push notification in the SALESmanago platform, the user must also consent in the browser window they are currently using. Moreover, the monitoring cookies assigned by SALESmanago are not linked to the notification consent cookie. Therefore, just clearing cookies will not eliminate consents to send notifications. After clearing the cookies and re-entering the website, the user will see the consent form again, and notifications will be sent to them regardless of whether the agrees again.
To create an agreement form go to
WEB PUSH => ADD NEW AGREEMENT FORM
To create a new form, go to Website Marketing → Web Push and click Add new agreement form.

Now you have Settings

[1] Tour – switch on the tour that will guide you through the process of the form configuration so you will not miss any step.
[2] Agreement form name – Enter the system title for the agreement form .
[3] Add tag to contacts who confirmed push messaging subscription – you can add tags to the contacts who agreed to receive web push notifications and thus you will be able to identify a web push notification recipient group and organize dedicated marketing campaigns. Separate tags with commas.
[4] Re-send agreement form if the contact does not confirm their messaging subscription – choose this option to set the time after which the agreement form appears again to the visitors who previously did not agree to receive notifications.
[5] Agreement form appearance interval – choose this option to set the time when the agreement form displays to users depending on their actions on the website. By default, the form appears immediately after a user enters the website.
- Number of visits (the number of user sessions on the website, a new session is counted 3 hours after the visit)
- Number of views (one view is counted for every reload or visit on a website)
[6] Show agreement form with a time delay – choose this option to set the time delay for the form display. By default, the form appears immediately after a user enters the website.
[7] Next – click it to go to the next window.
Now you are redirected to Agreement form. You can create right here:
[A] Graphic consent form
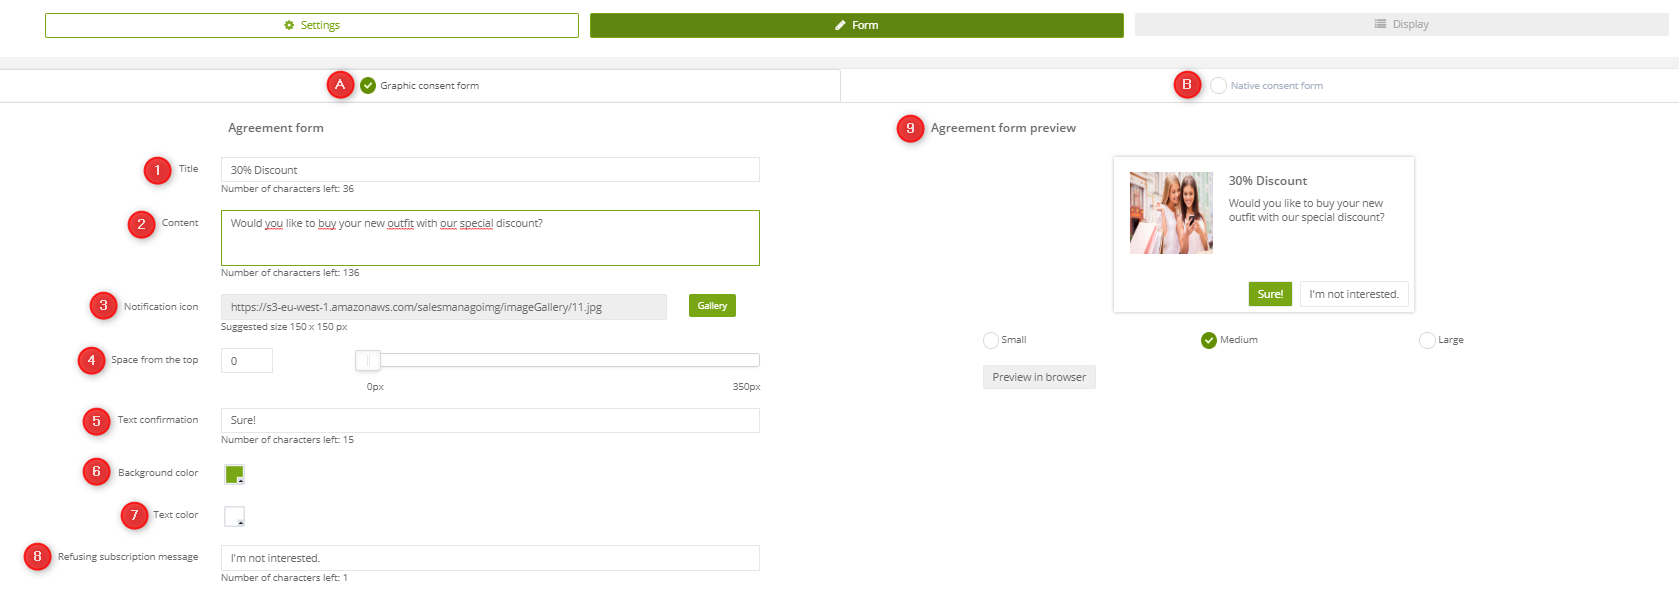
[1] Title – Enter the title of the agreement form to identify it easier in the system. Up to 48 characters.
[2] Content – Enter the actual content of the agreement form. Up to 200 characters.
[3] Notification icon – You can add graphics if you want. The following file formats can be used as icons: JPG, PNG, WebP, ICO/CUR, and BMP. The GIF format is not supported by browsers. The suggested picture size is 150×150 px.
[4] Space from the top – Drag the slider to increase the pixel separation between the form and the upper screen corner. By default, the form appears at the central axis of the screen at the top of the browser window.
[5] Text confirmation – enter the text of the confirmation button. Up to 20 characters.
[6] Background color and text color – you can change the background color of the agreement button.
[7] Text color – you can change the font color of the agreement button.
[8] Refusing subscription message – enter the text of the refusal button. Up to 20 characters.
[9] Agreement form preview – you can see the form preview here while entering the changes.
Below you can see the Confirmation window
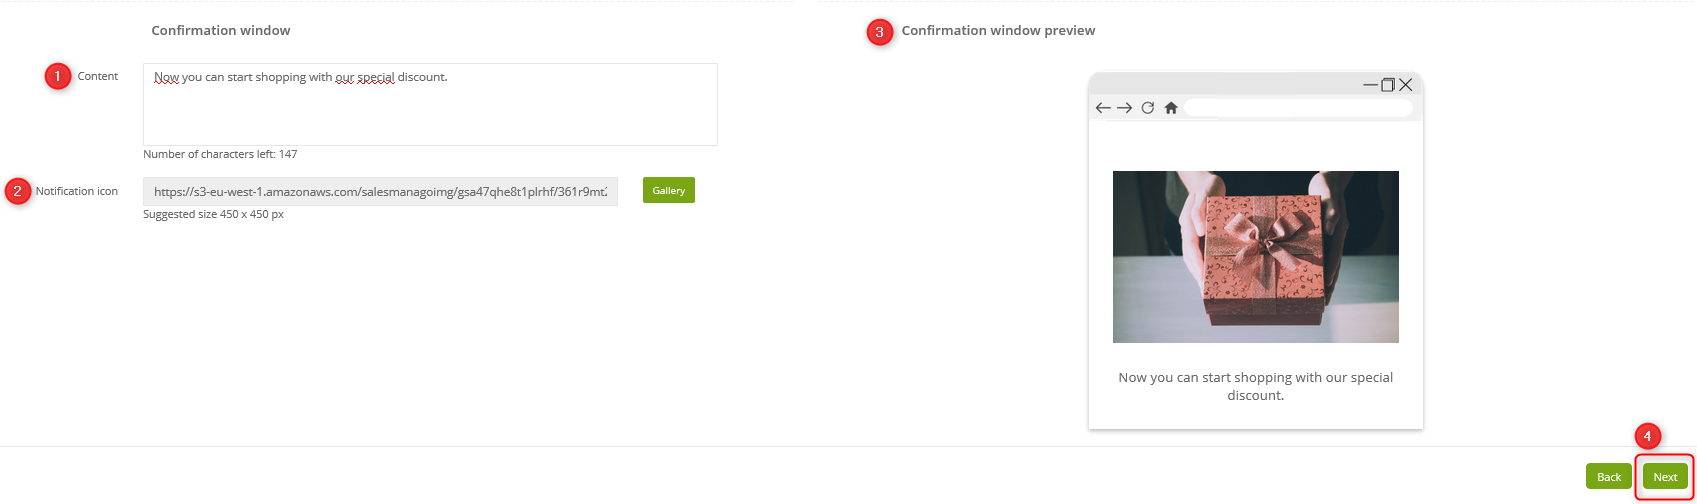
[1] Content
[2] Notification icon
[3] Confirmation window preview
[4] Next
[B] Native consent form
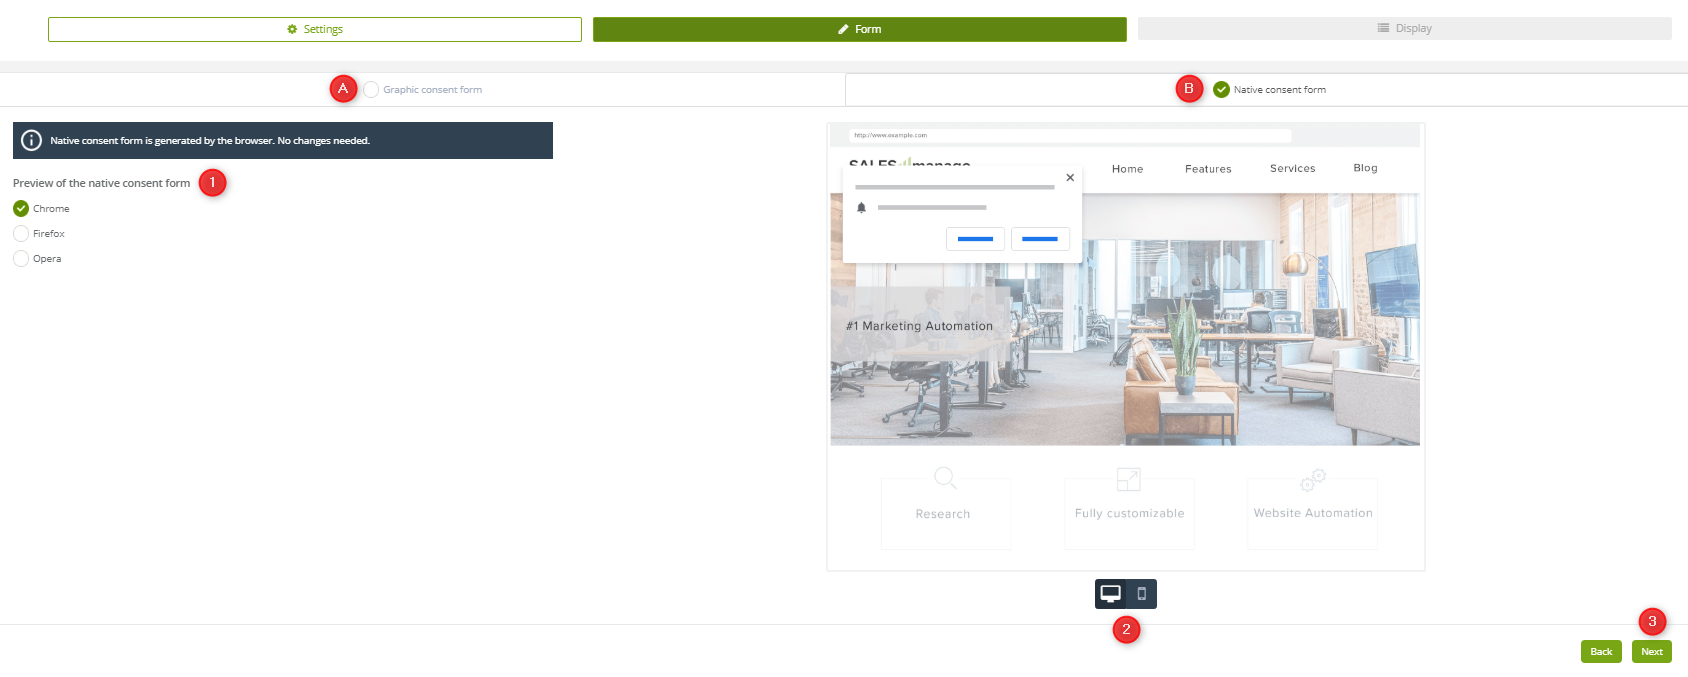
[1] Native consent form preview – in this place you can see how your native consent form will be displayed on three different browsers.
[2] This button allows you to see how your form will be displayed on desktops and smartphones.
[4] Next – click this button to go to Display view.
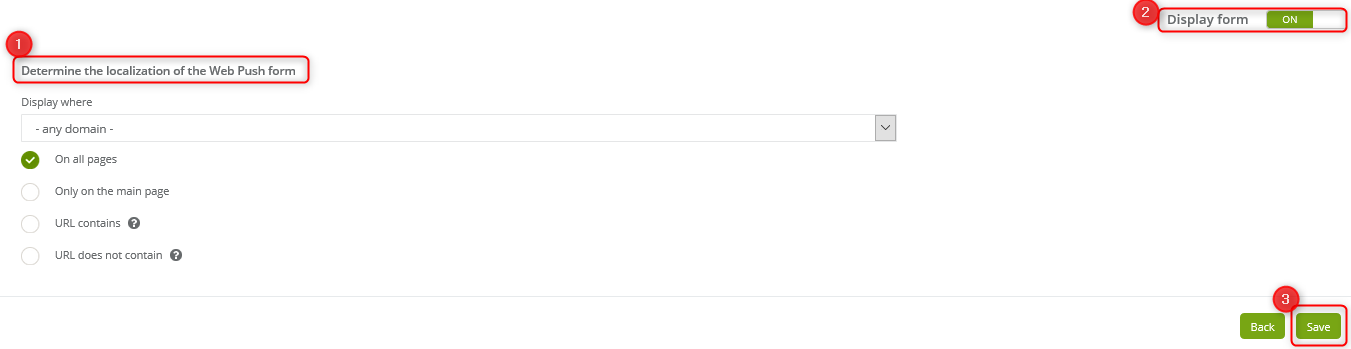
[1] Determine the localization of the Web Push form – here you can decide where your Web Push form will be displayed
[2] Display Form – click ON to activate the Form
[3] Save – click it when your settings are ready
IMPORTANT: To display your Agreement form you don’t have to paste any additional code. The monitored code on your website is enough. You just need to active your Agreement form (Display form: ON). If you have used this feature previously and you already have a code to display your agreement form, you have to delete it, only then new display settings will be working.