


This article describes how to create email groups and A/B test groups and how to use such groups when searching the Email List.
Emails on the SALESmanago platform are conveniently divided into categories (Standard, A/B tests, Periodic, Birthday, and Subscription confirmation emails). Additionally, you can manage your emails and A/B tests by arranging them into groups, according to your own criteria and preferences. Groups help you organize your work and search the Email List.
To see or create an email group or an A/B test group, go to
Email Marketing → Email List
Contents
- Getting started
- Creating a group
- Assigning to a group
- Searching the Email List by groups
- Editing or deleting a group
1. Getting started
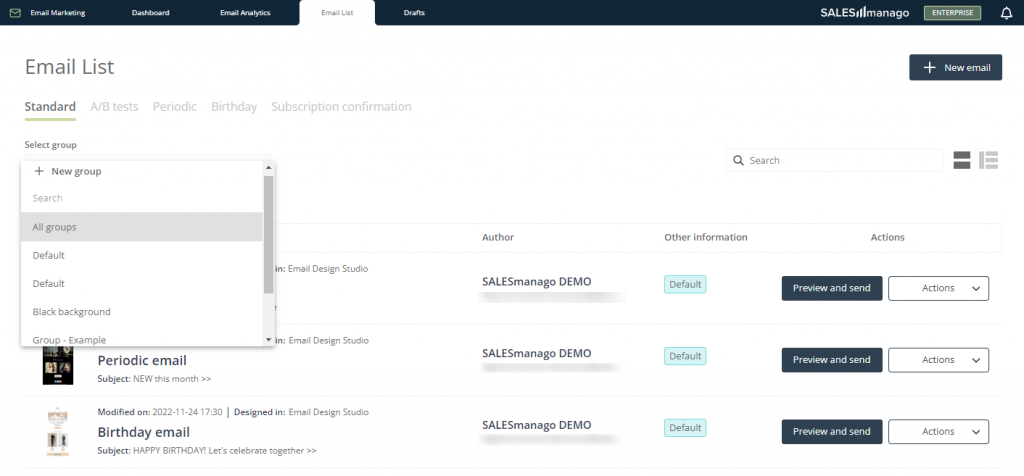
The Email List on the SALESmanago platform contains five convenient tabs that allow you to quickly access emails from a number of categories. In addition to the Standard tab, which contains all emails created on your account, you can easily switch between A/B tests and periodic, birthday, and subscription confirmation emails. However, you can also segregate your emails according to your own criteria, such as the background color, the year of creation, the marketing campaign in which they are used, etc. To achieve this, create and manage groups of emails and A/B tests.
You can create a group within any of the Email List tabs, meaning that you can create a number of groups for standard emails, a number of groups for A/B tests, etc. On the Email List, the group to which an email or A/B test belongs is indicated in the column Other information:

Groups increase the transparency of your Email List, allowing you to better organize your work. This article explains how to create, edit, and delete email and A/B test groups and how to use them when searching for an email.
2. Creating a group
A. Creating an email group
You can create an email group when you are on the Email List or in any of the SALESmanago email wizards (Email Design Studio, HTML, ZIP, URL, FreeMarker).
i. Email List
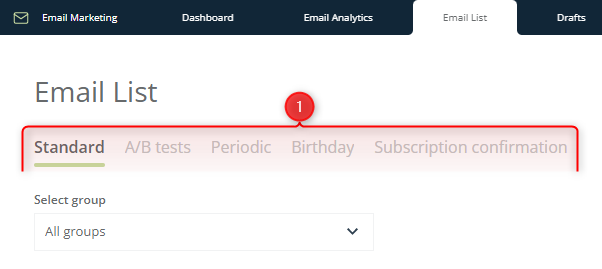
To create a group when you are on the Email List, first select the appropriate category tab [1]. For instance, if you want to create a group of birthday emails, go to the Birthday tab.
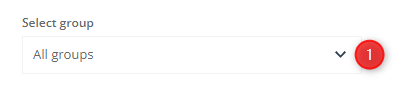
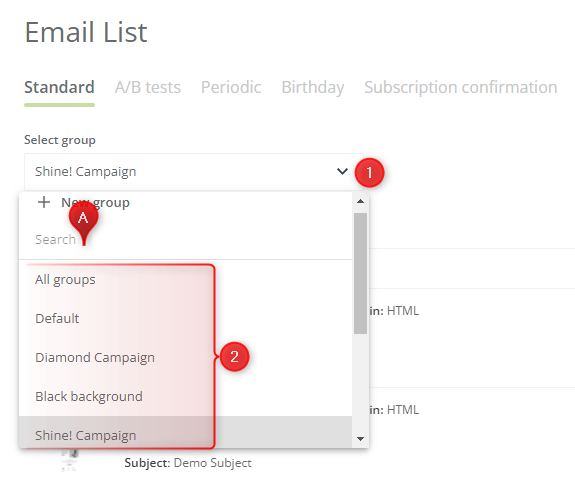
Then open the Select group menu [1]:
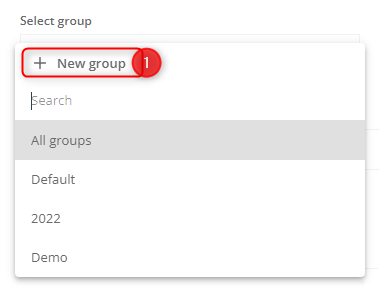
Click on + New group [A]:
Enter a name for your new group, which will allow you to identify it on the list of groups, and click Save. You have just created a new email group.
ii. Email wizards
You can add a new email group when creating or editing an email in any of the SALESmanago wizards (Email Design Studio, HTML, ZIP, URL, or FreeMarker).
IMPORTANT: The type of group you can create in a wizard depends on the category of email you are creating or editing. For instance, if you are editing a birthday email, by following the instructions below, you will add a new group of birthday emails, which will later be visible under the Birthday tab on the Email List.
- In the Email Design Studio, go to the side panel and select Sending settings [1]. Below the input field where you can enter the name of your email, you can check the email group to which the email currently belongs (in the picture below, this is Default). To create a new group and automatically add the created or edited email to that new group, click on Change group [2] and then + New Group [3].
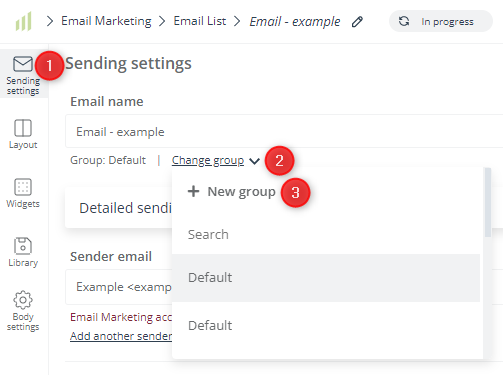
- A new window will appear. Enter a name for your new group, which will allow you to identify it on the list of groups, and click Save. You have just created a new email group.
- In the HTML, ZIP, URL, and FreeMarker wizards, go to the Settings tab [1] and click on the plus icon [2] next to the list of existing email groups:

- Enter a name for your new group, which will allow you to identify it on the list of groups, and click Save. You have just created a new email group.
B. Creating an A/B test group
You can create an A/B test group when you are on the Email List or in any of the SALESmanago email wizards.
i. Email List
When you are on the Email List and want to create a new A/B test group, go to the A/B tests tab [1] and open the Select group menu [2]. Then click + New group [3].
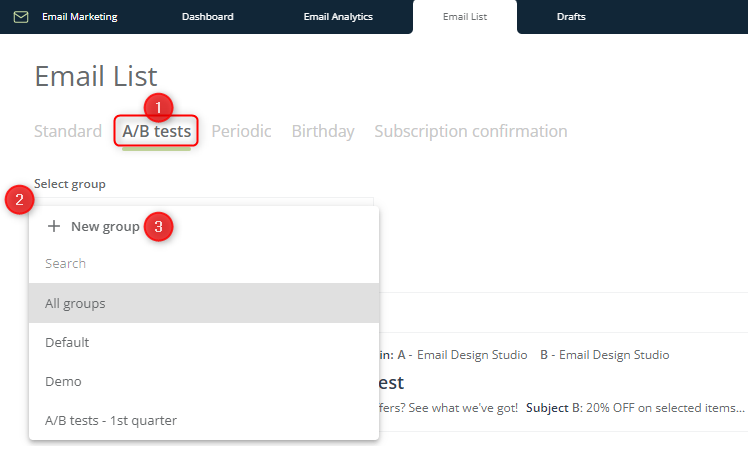
Enter a name for your new group, which will allow you to identify it on the list of groups, and click Save. You have just created a new A/B test group.
ii. A/B test configuration screen
You can create a new A/B test group when creating or editing a new A/B test.
On the A/B test configuration screen, in the Name and group section, you can check the A/B test group to which the created or edited test currently belongs (in the picture below, this is Default). To add a new A/B test group and automatically add the created or edited email to that new group, click on Change Group [1] and then + New group [2].
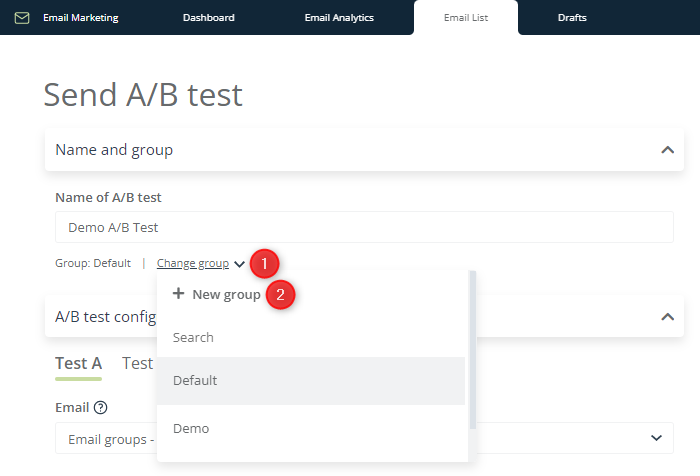
Enter a name for your new group, which will allow you to identify it on the list of groups, and click Save. You have just created a new A/B test group.
3. Assigning to a group
A. New emails
All new emails are automatically added to their respective Default groups (for instance, a new periodic email will be added to the Default group of periodic emails). To assign an email to a different group while you are still creating that email, just open the drop-down menu containing the list of existing groups and select the correct group. If you decide to add a new group, the email will automatically be assigned to that new group (you can always re-assign it to a different group afterward).
B. Existing emails
To change the group for an existing email, you need to edit that email. On the Email List, click Actions and then Edit. You will be redirected to the wizard in which the email was created. There you can open the drop-down menu containing the list of existing groups and select the group to which you want to assign the edited email. Then save the email as for any other changes.
C. A/B tests
The group to which an A/B test belongs can be defined only when creating that A/B test (as A/B tests cannot be edited). To assign an A/B test to a different group, on the A/B test configuration screen, click on Change group [1]:
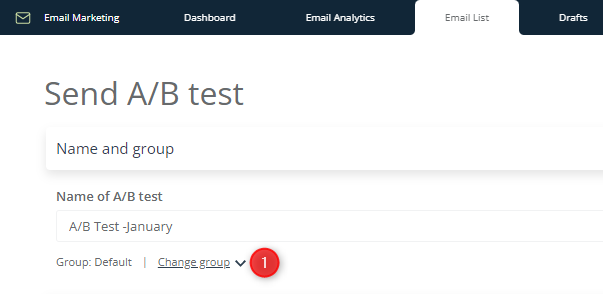
You will see the list of existing A/B test groups. Select the group to which you want to assign the new A/B test.
If you decide to add a new group, the email will automatically be assigned to that new group (you can still select a different group afterward, though).
4. Searching the Email List by groups
You can use email and A/B test groups to narrow down the lists available under each tab on the Email List. This can be particularly useful, for example, if you have a separate email group for each Email Marketing campaign you have run and want to see all emails created as part of a selected campaign. Groups can also facilitate the searching process—for instance, if you do not remember the name or subject of an email but know which group the email belongs to.
To filter the Email List by groups, just go to the correct tab and open the Select group menu [1]. Select the correct group from the list of groups [2]. You can also use the search box [A]—just start typing the group’s name to find it more quickly.
When you have selected a group, only the emails or A/B tests belonging to that group will be displayed on the list below.
5. Editing or deleting a group
You can edit or delete a group at the level of the Email List. To do so, go to the correct tab and open the list of existing email or A/B test groups. Move your cursor over the item you want to edit or delete. The item will be highlighted in gray, and two icons will appear:
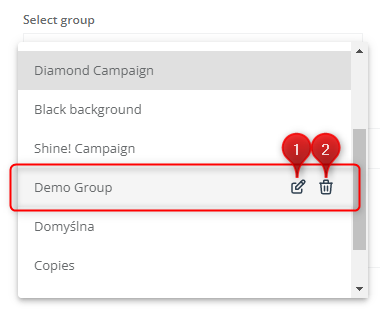
To edit the group (i.e., to change its name), click on the pencil icon [1]. A new window will appear. Enter a new name and click Save.
IMPORTANT: To modify the contents of a group, that is, to add or remove items from a group, you need to edit or delete those items individually. For instance, if you want to remove an email from a group, you need to assign that email to another group (e.g., Default) or delete that email altogether.
To delete the group, click on the trash can icon [2]. If you are certain that you want to delete the group, confirm your choice in the new window that will appear.
IMPORTANT: By deleting a group, you do not delete any emails belonging to that group. All emails belonging to that group will be moved to the default group. If you want to assign them to other groups afterward, you need to edit each of them individually.