


One of the basic options for the contact’s base segmentation in the system is assigning a state to a particular contact. The contact’s state is automatically given by the system. The use of such option and its scope depends on preferences of the SALESmanago user’s account. The main aim is to help with maintaining and interpreting basic statistics and precisely classify e.g. your potential customers. What is more, using contact state in your own database expands the scope of possible automations.
SALESmanago provides four basic contact state options: PROSPECTS,PARTNERS, CLIENTS, OTHER (other visits from the anonymous traffic).
Contents
- Changing the contact state
a) importing contact base to the system
b) adding a contact to the system manually
c) CRM – manage contacts
d) API – contact/upsert method - Checking the contact state
a) contact card - Additional options with the use of the contact state
1. Changing the contact state
[A] Importing contact base to the system

While importing the contacts to the SALESmanago system you have several options of assigning the contacts. You can assign tags to new contacts, change the status of consent for marketing communication (i.e. you can import contacts with opt-in status [by default] or opt-out). But you can also change the contact state during the import. You can find more information about the import here
[B] Adding a contact to the system manually
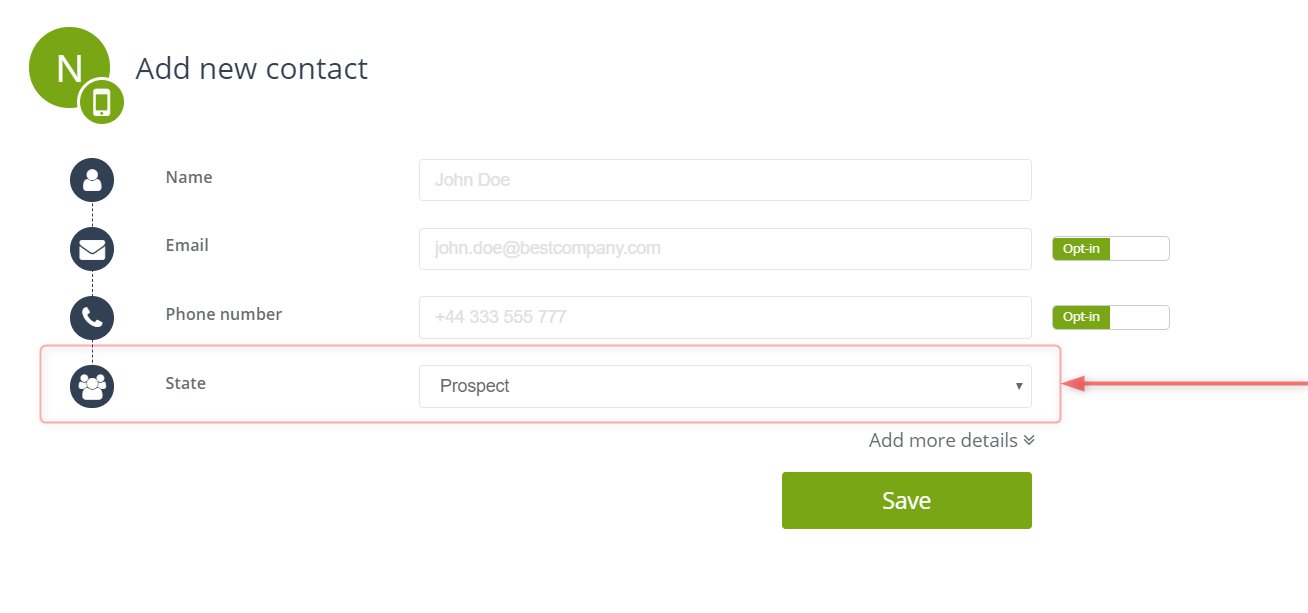
To add a new contact, go to CRM => Contact list => Add new contact. The fourth field [on the illustration above] lets you change the contact state.
[C] CRM – Manage contacts
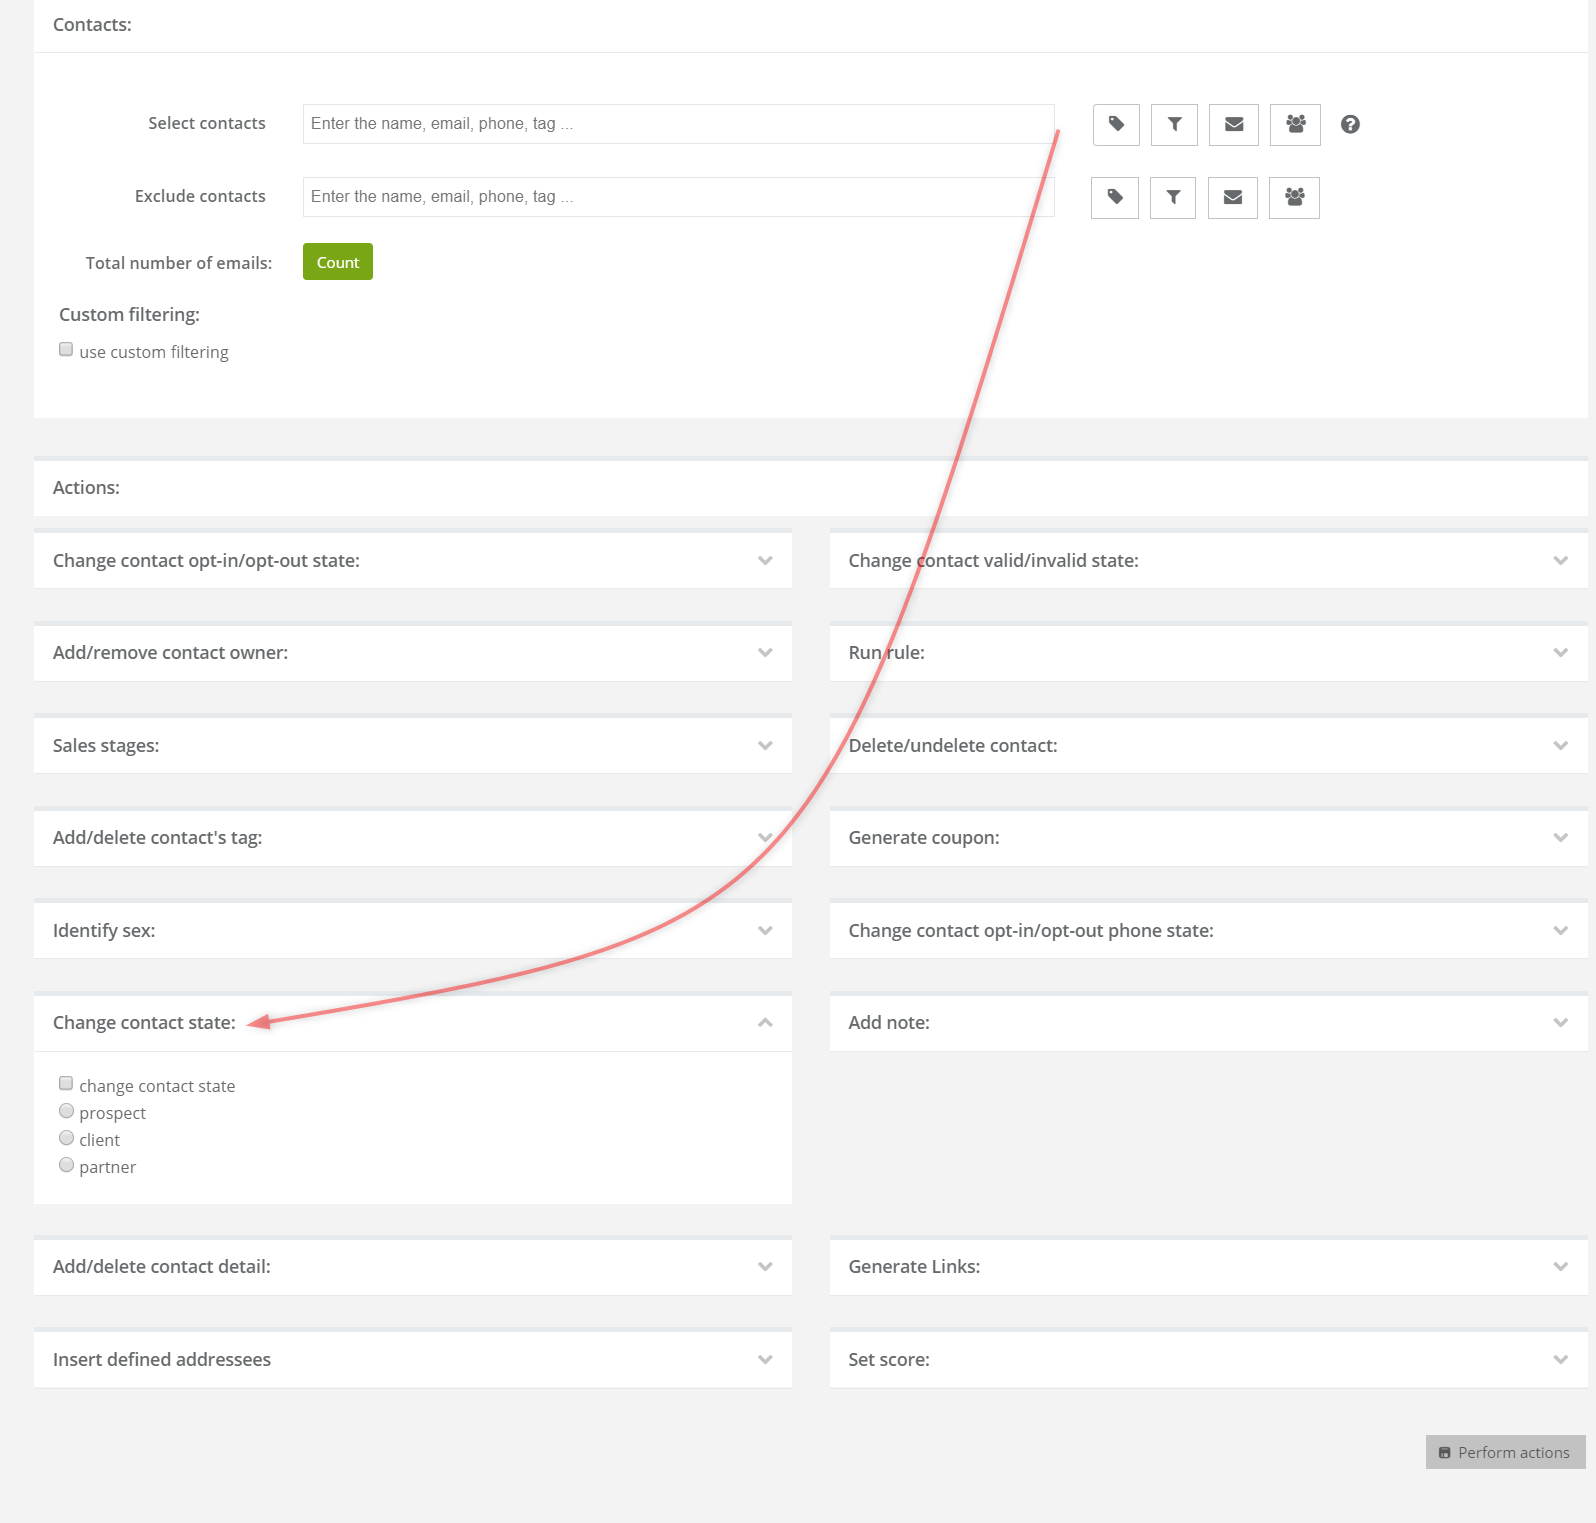
You can change the contact state for a single contact or groups os contacts by means of a collective contact management. You can find more information about managing contacts through CRM here
[D] API – contact/upsert method
The contact state can be modified by means of sending data through API by means of contact/upsert method. You can find more details about it here
2. Checking the contact state
[A] Contact card

Once you open a contact card of a particular user (path: CRM => Contact list => Details of the chosen user), you can check the current contact state. Click the button Edit which will enable you to update the details, including the contact state.
3. Additional options with the use of the contact state
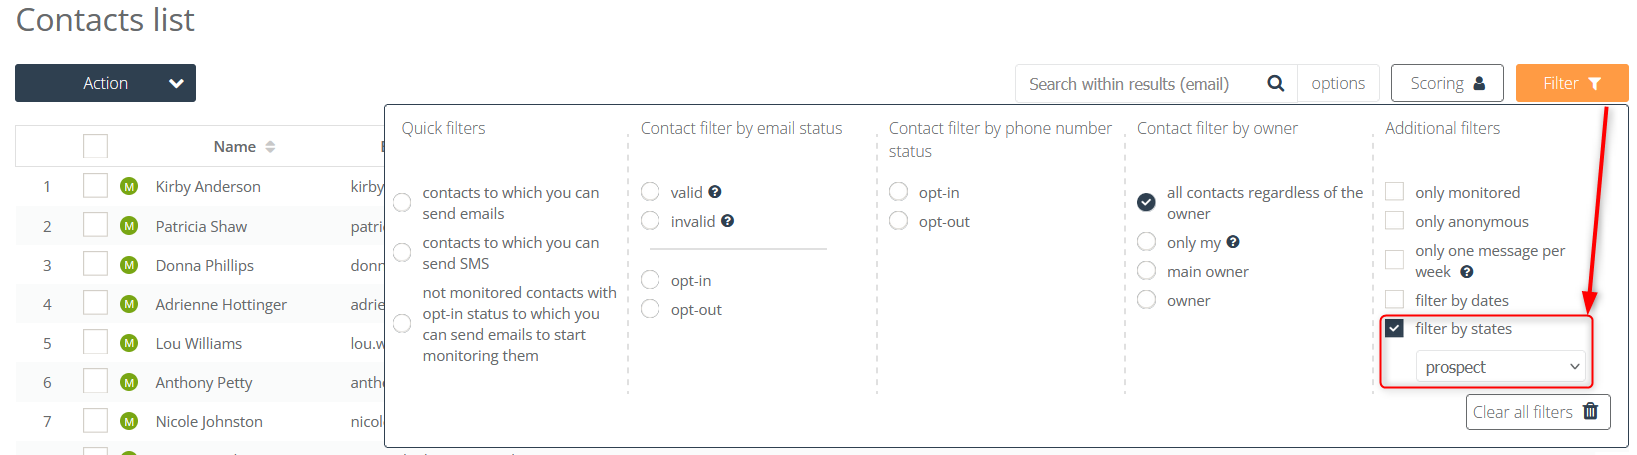
- sorting the contacts with regard to the assigned contact state on the contact list: CRM => Contacts list [example on the illustration above]. It lets you verify quickly the contact group that belongs to a certain contact state.
- exporting contact through the choice of state – click here for more information,
- addressing emails directly to users with a given contact state – click here for more information,
- identification of the contact’s state at particular stages of the sales funnel,
- record of a particular contact making a purchase of your product or service by changing its status from PROSPECT to CLIENT.
- automated change of the contact state as a response to a certain event (e.g. opening an email) in Automation rules – click here for more information
- execution of an automation rule contingent on the contact state in Automation rules – click here for more information
Submit your review | |